Part 3: Integrate with Authelia
Prerequisite
You must first setup Authelia using my tutorial HERE.
Reverse Proxying Authelia
Follow the steps in https://docs.ibracorp.io/traefik/master/unraid/proxying-your-first-app/enabling-authelia-server-authentication#reverse-proxying-authelia
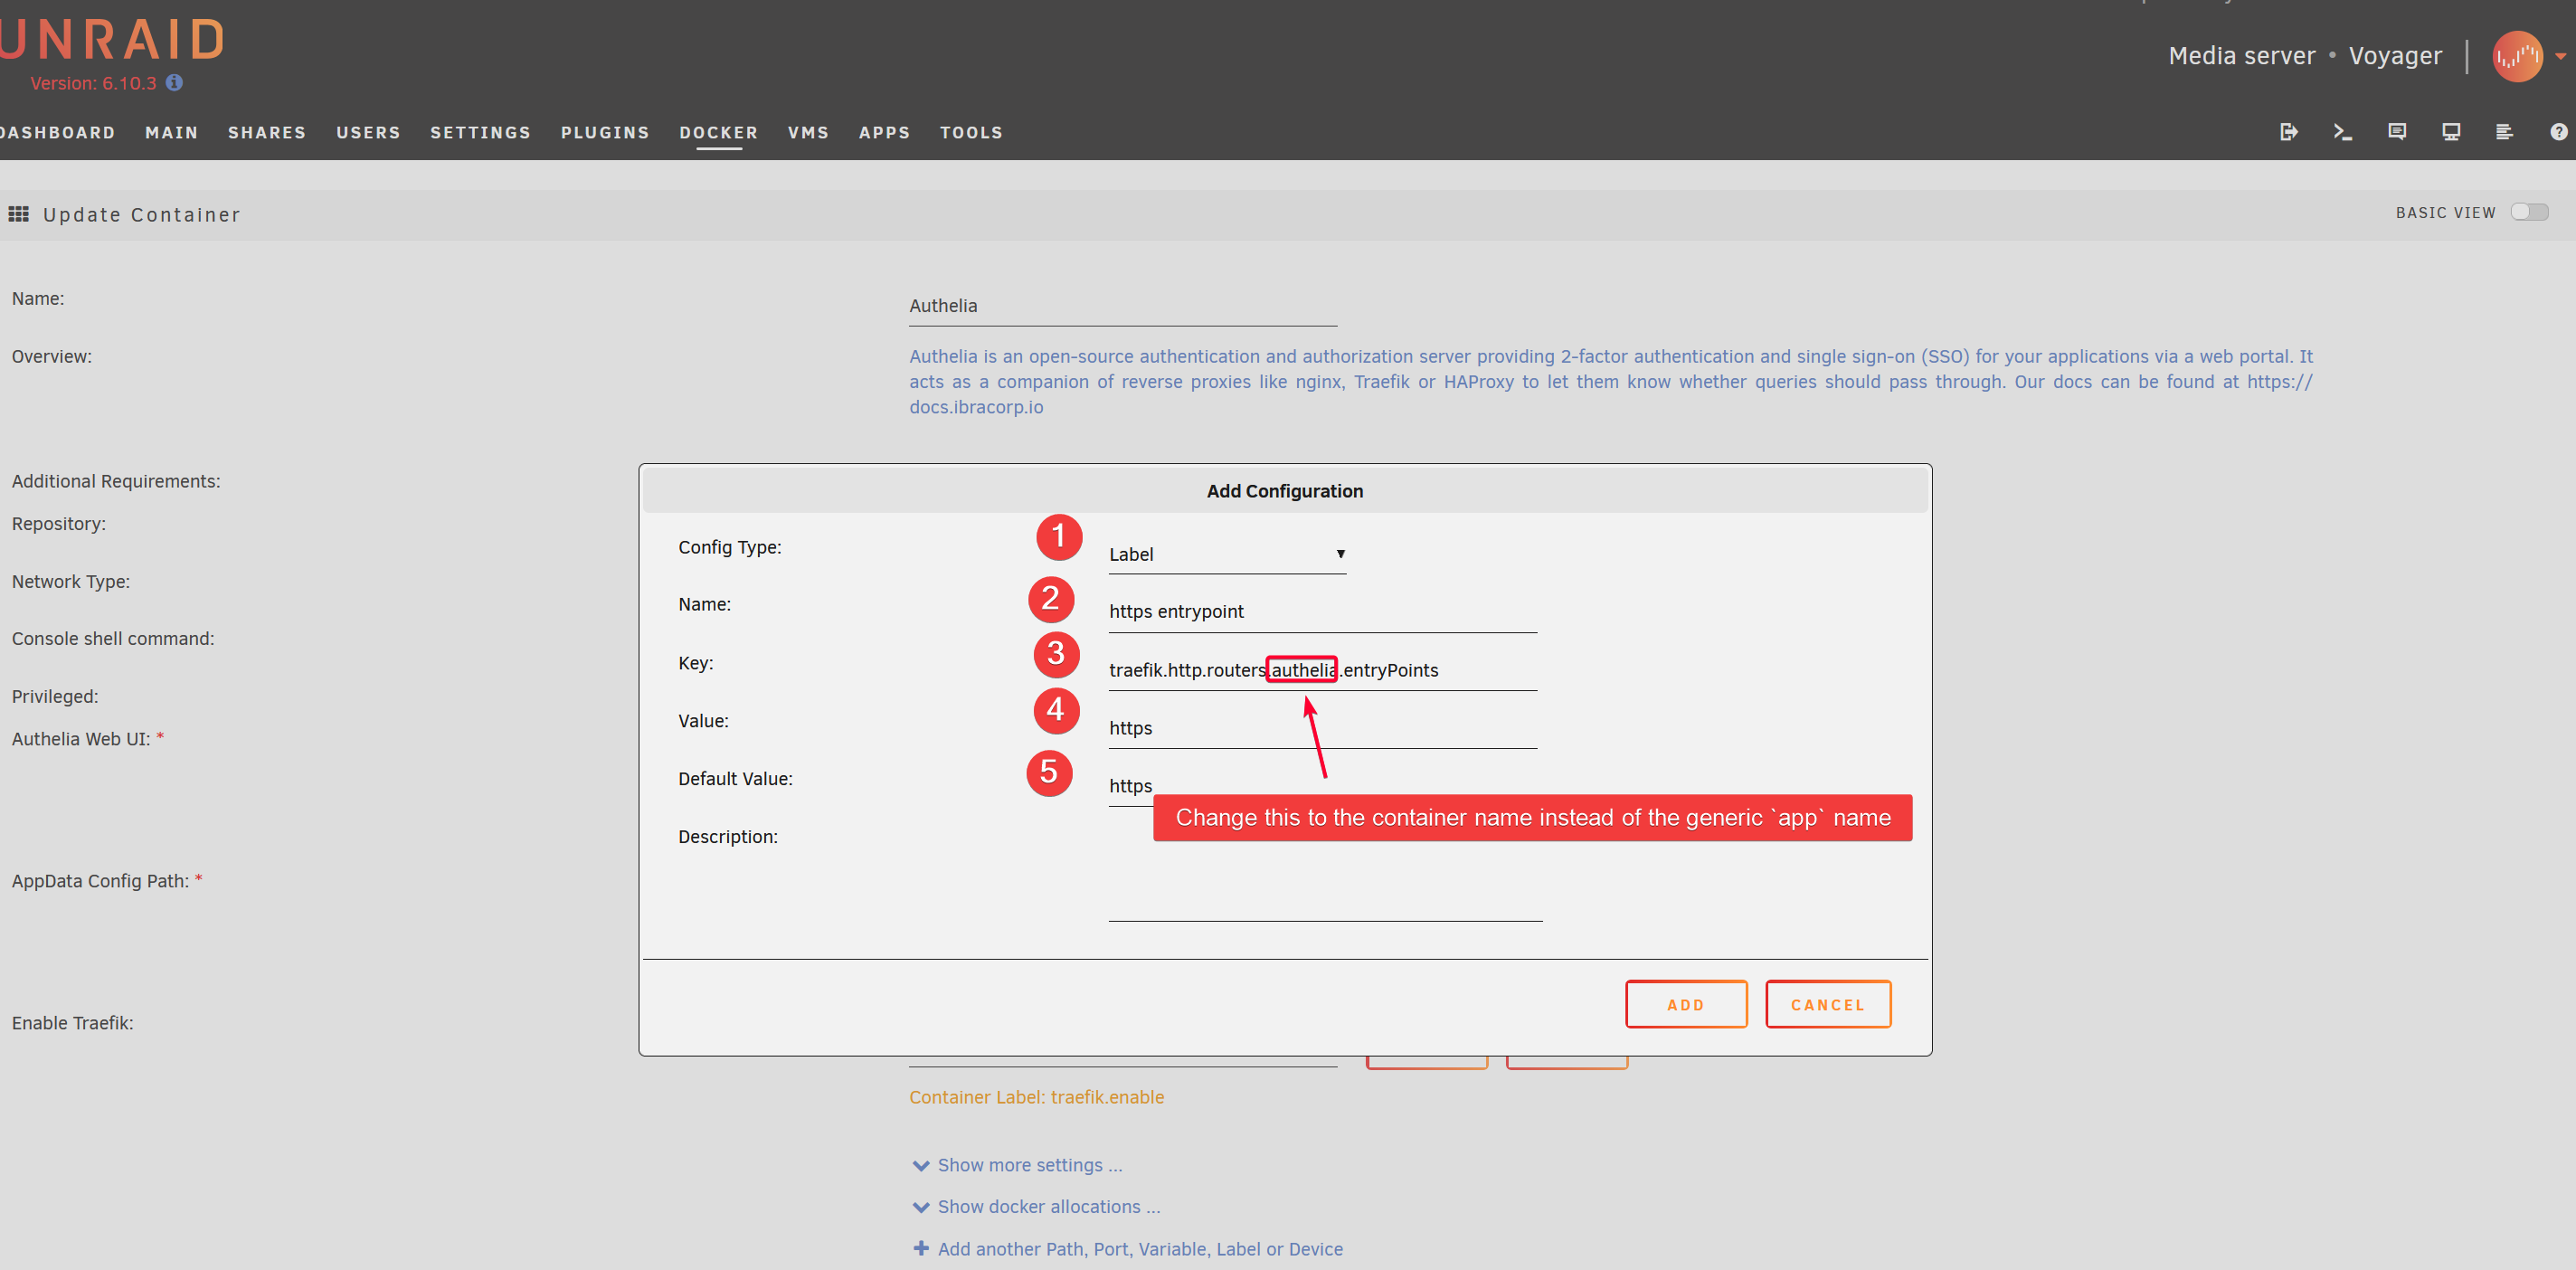
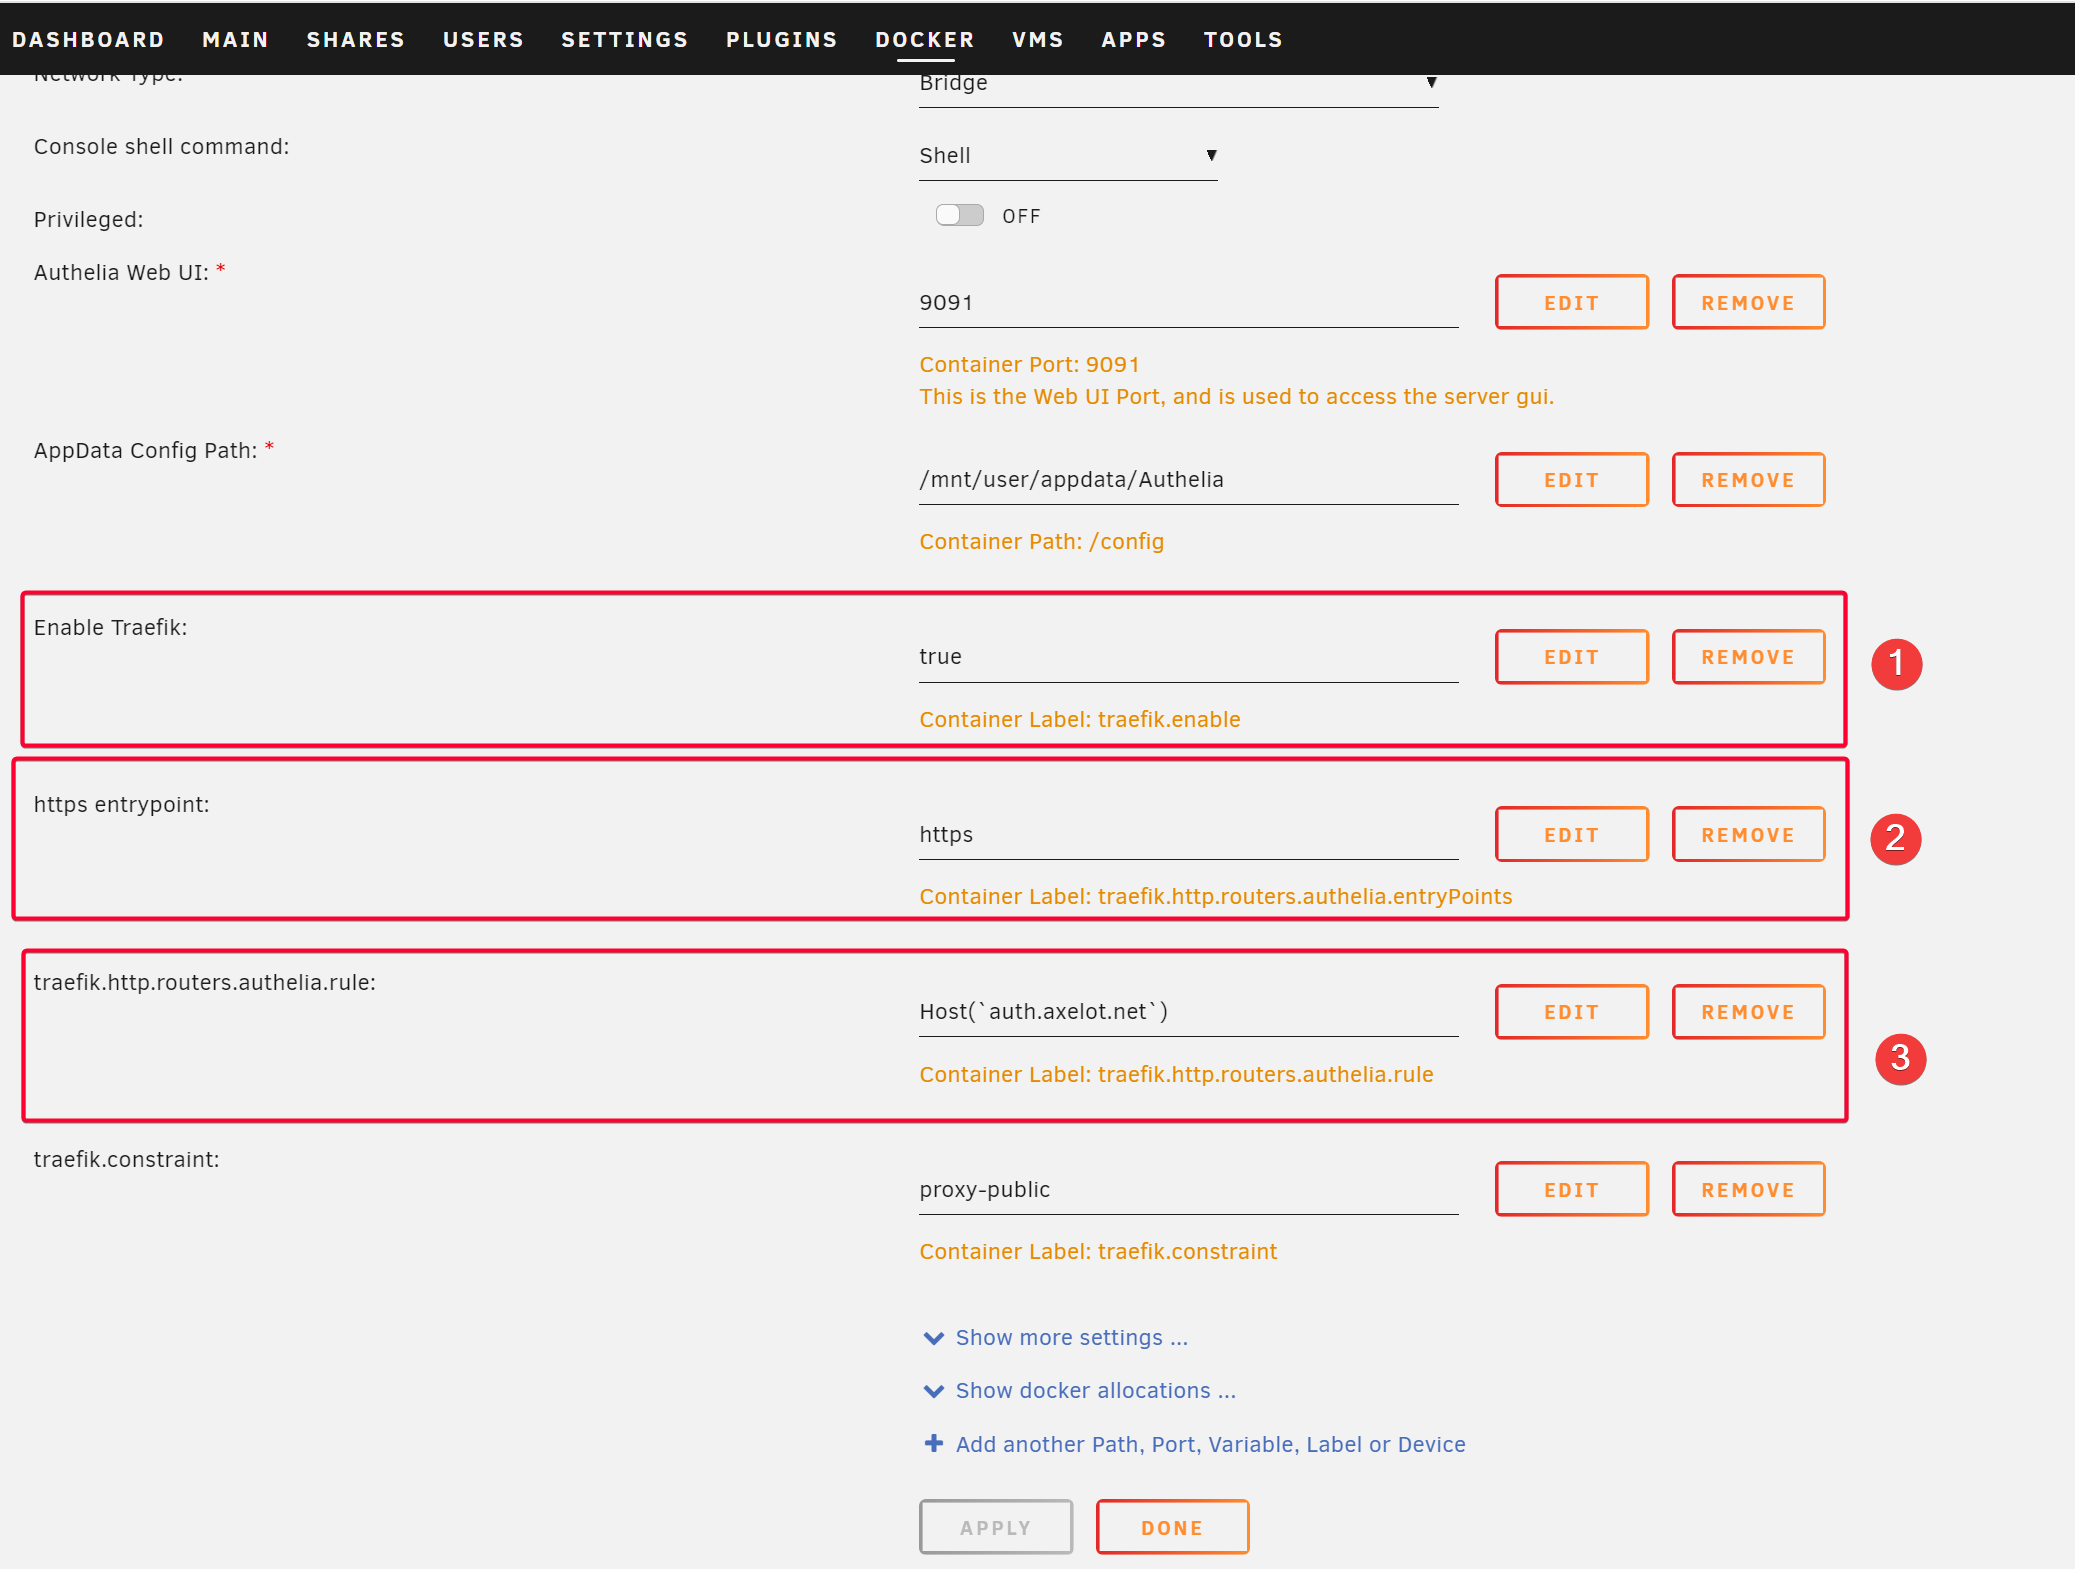
Add three Labels to Authelia container template.
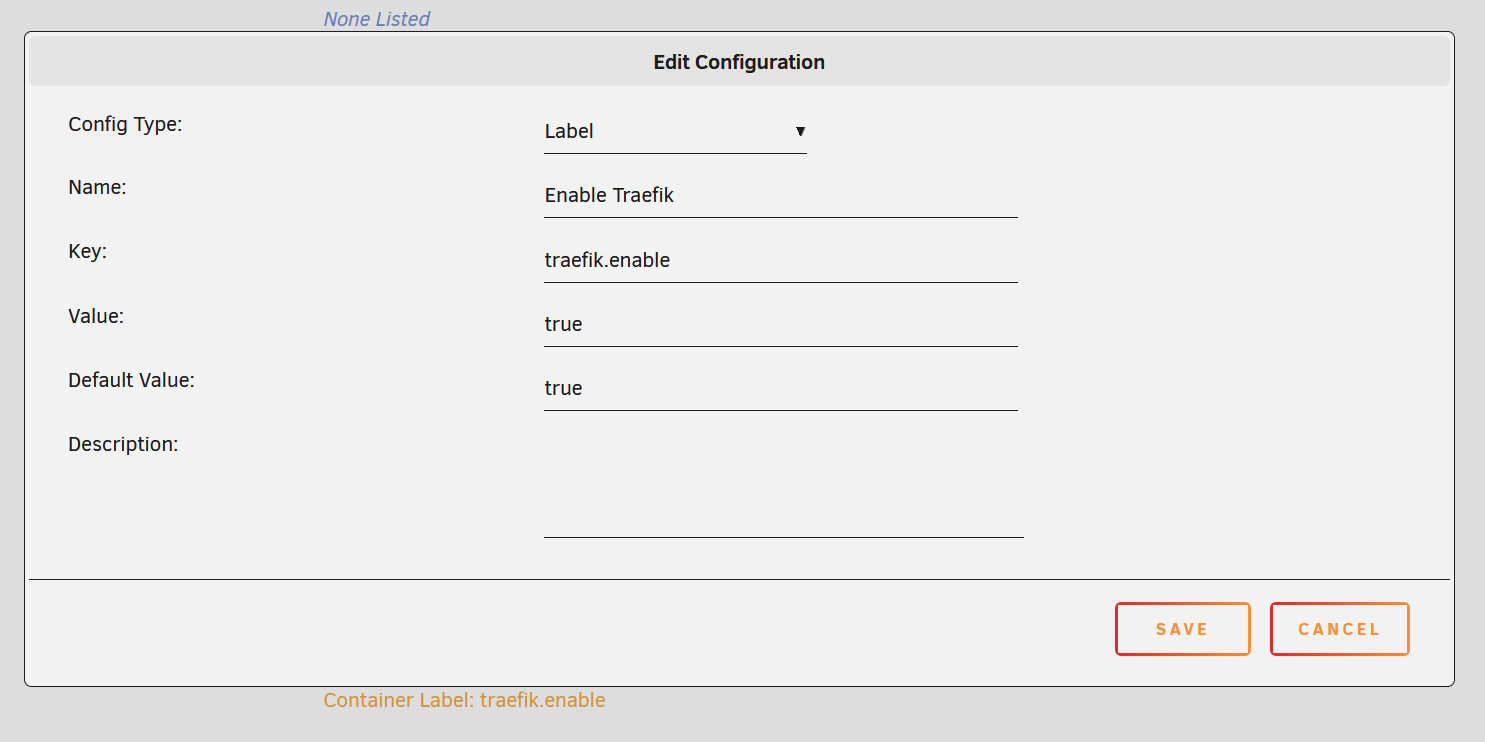
After adding all three labels.
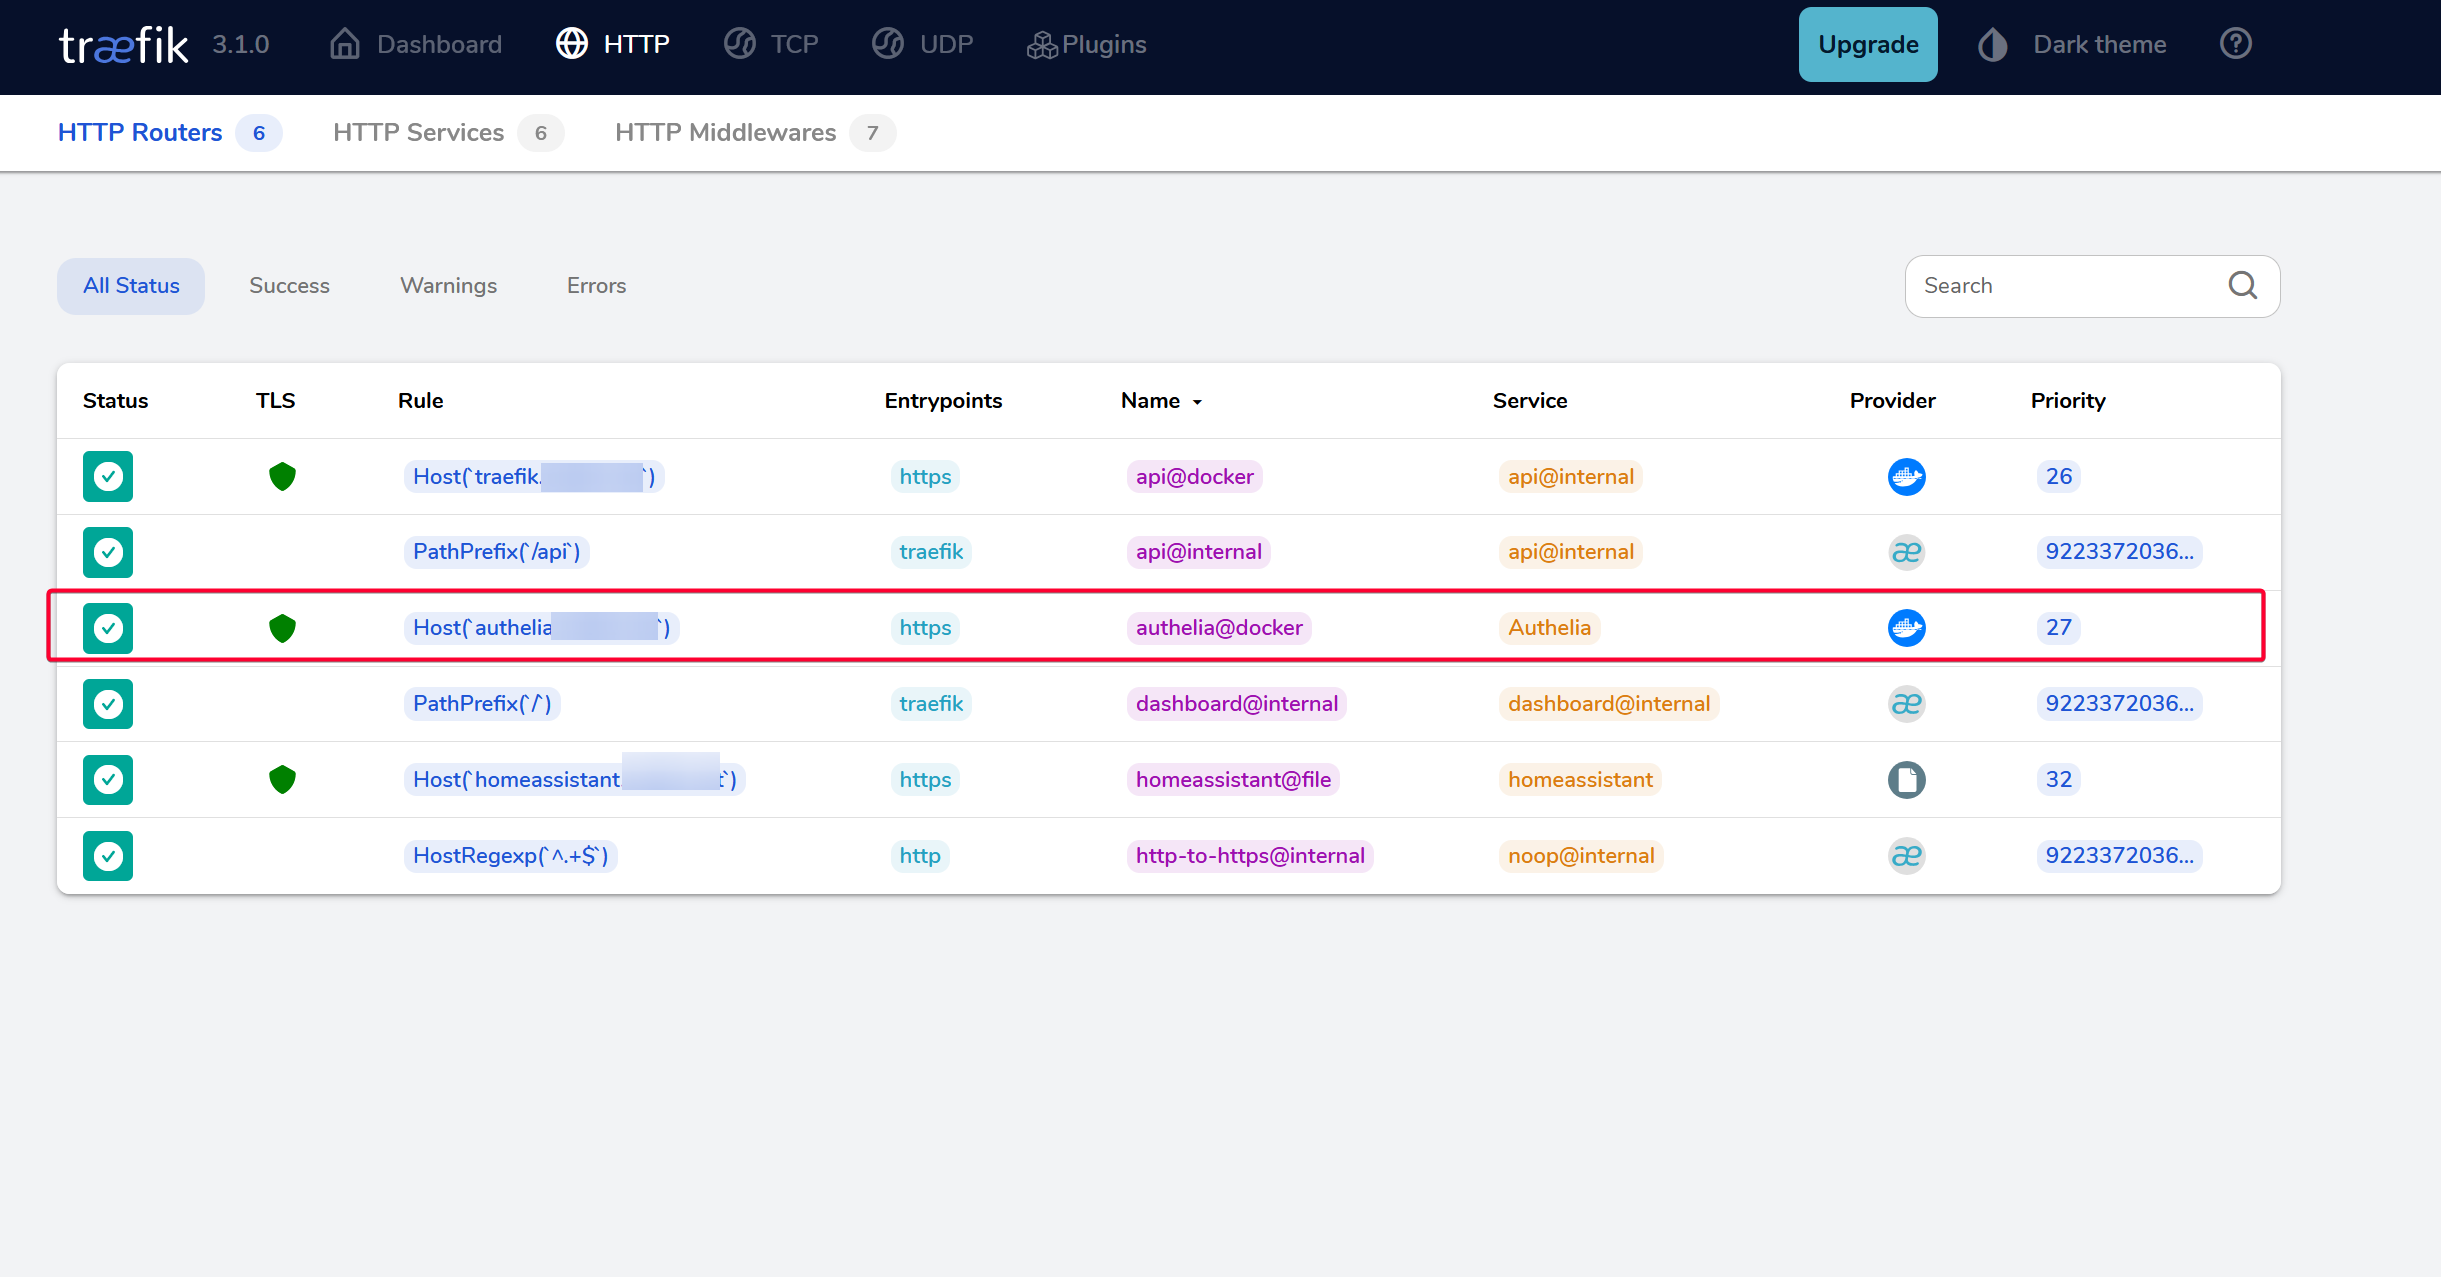
Verify
Check Traefik HTTP dashboard and you should see the newly added route for authelia.DOMAIN_NAME. By default Traefik will set the hostname to use the same name as the container name.
Enable Authelia for Application
With Traefik now proxying traffic for auth.DOMAIN.COM, we can now configure any service to use Authelia to handle the authentication and authorization.
Follow the steps in https://docs.ibracorp.io/traefik/master/unraid/proxying-your-first-app/enabling-authelia-server-authentication#enable-authelia-on-the-application
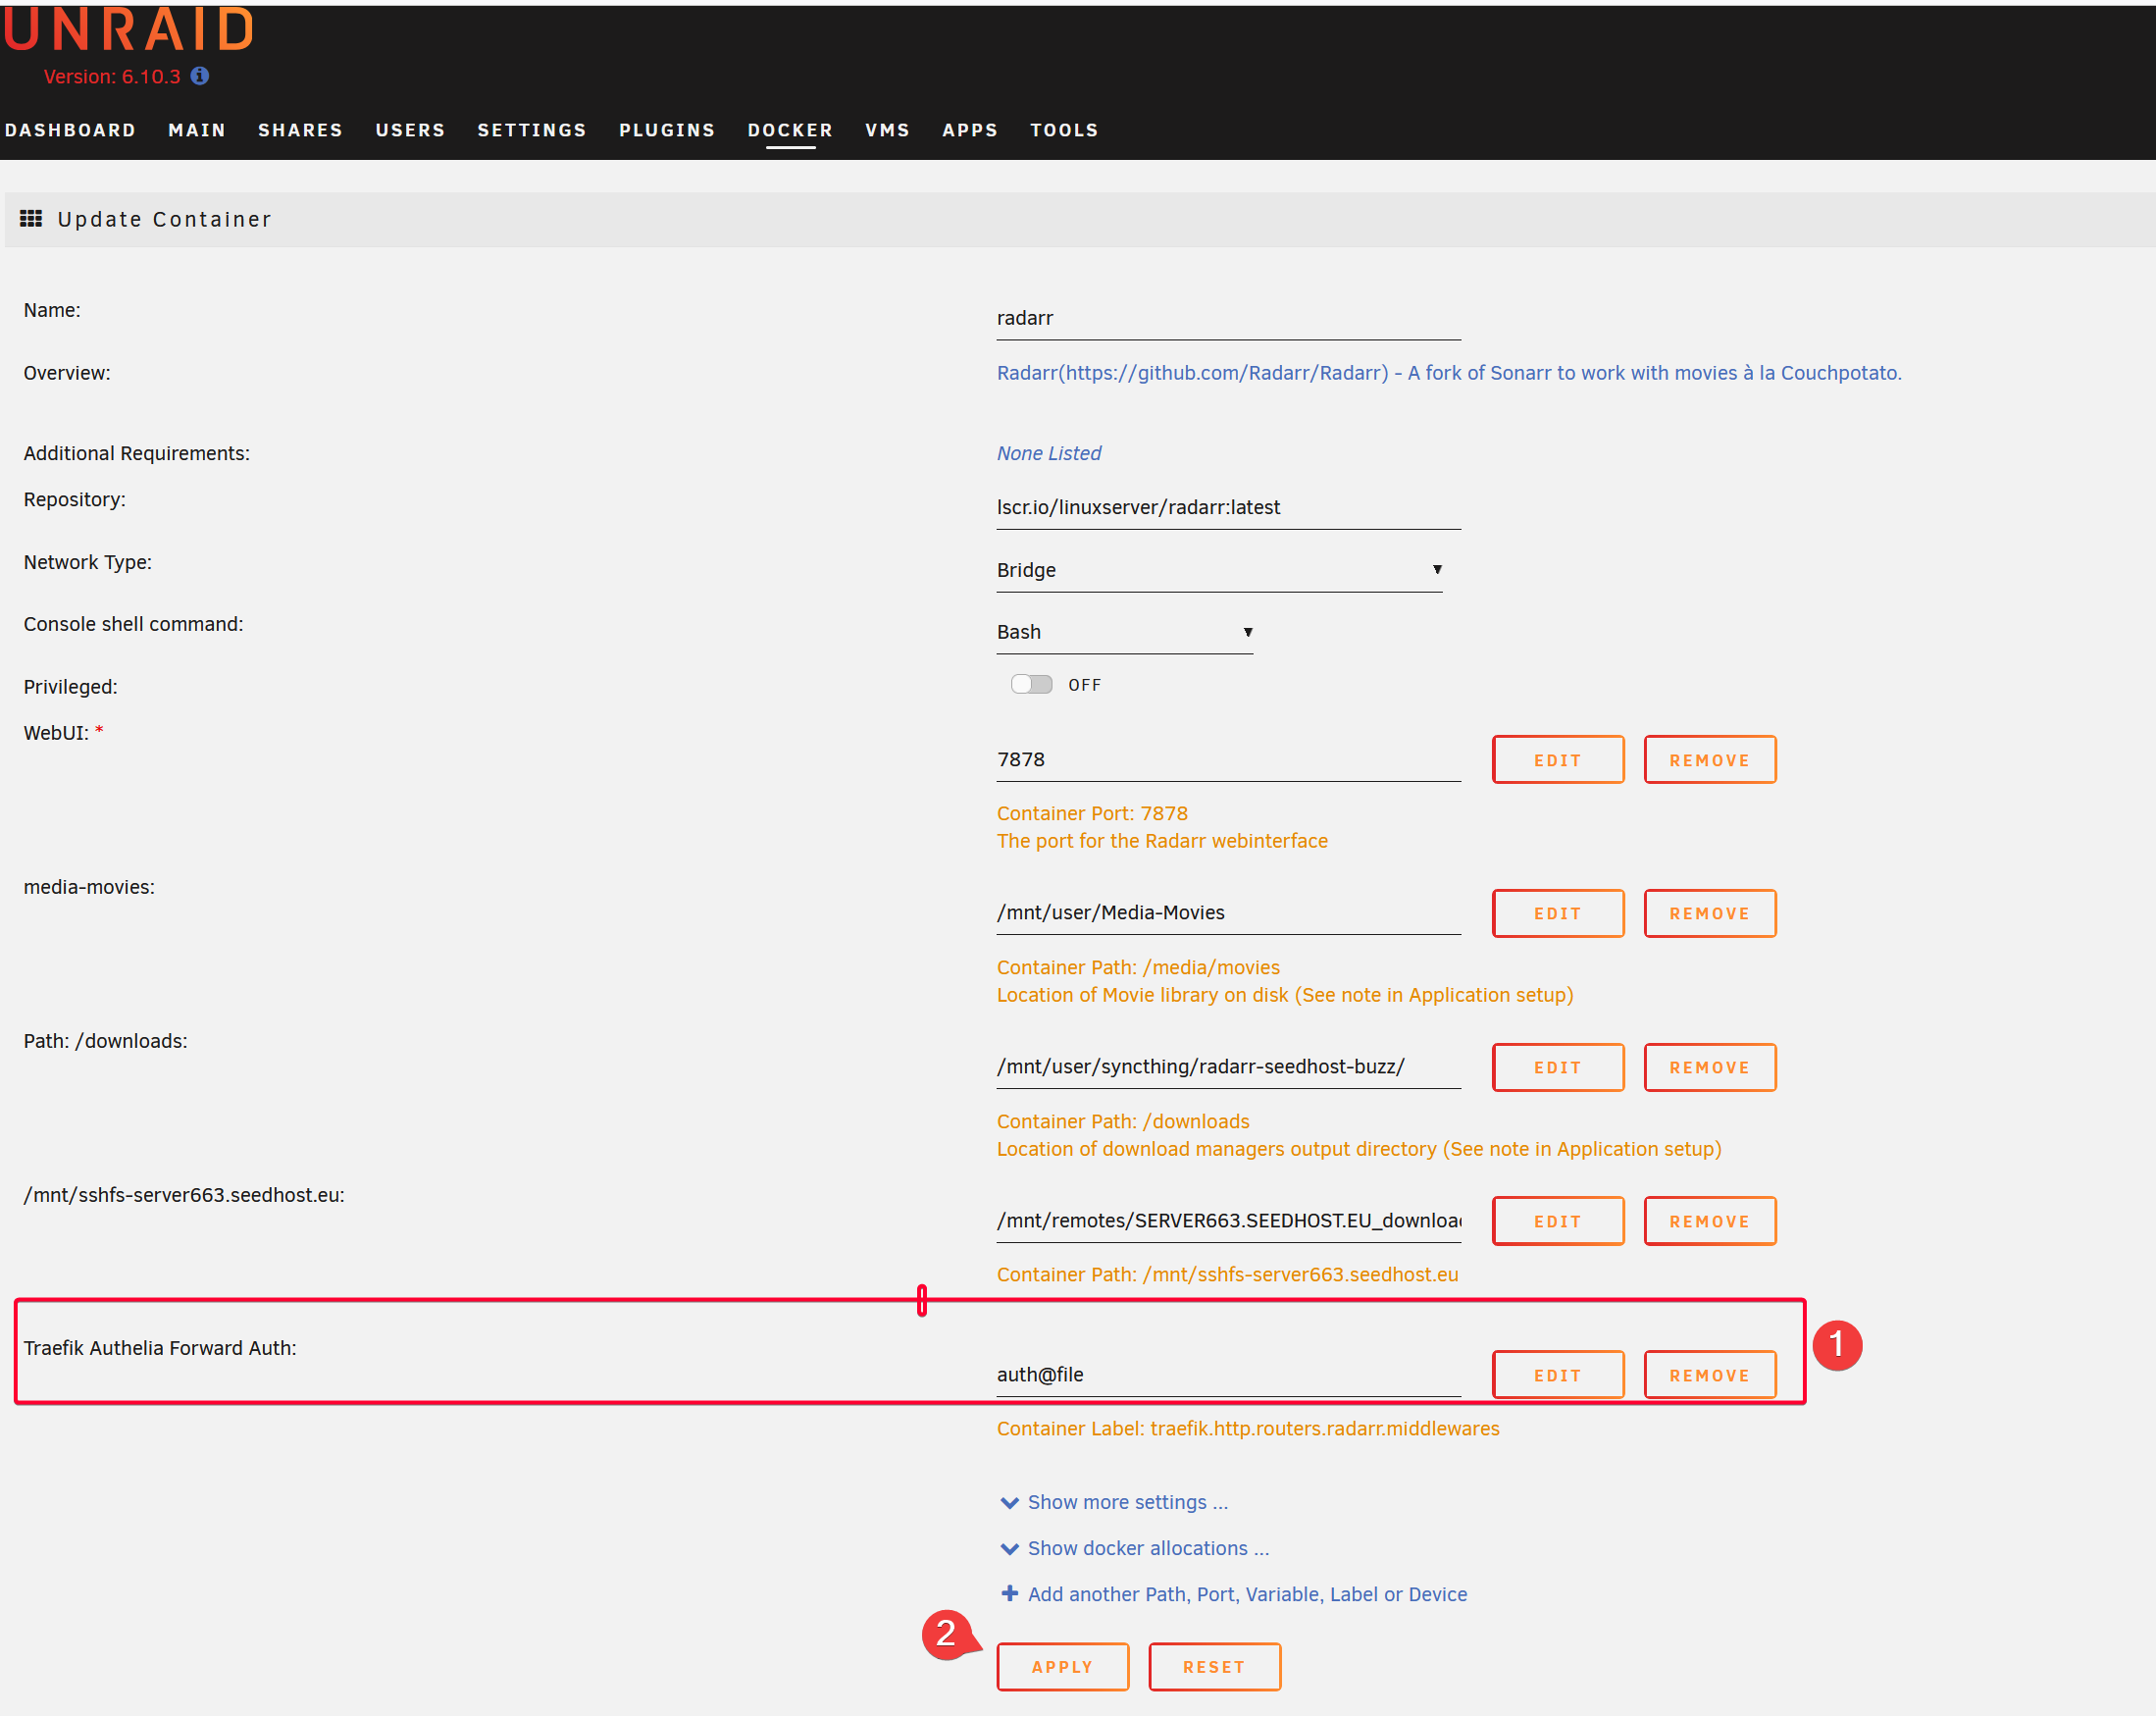
Let’s use Radarr for example.
We just have to add one label traffic.http.routers.<APP>.middlewares. Typically I would replace <APP> with the container name.

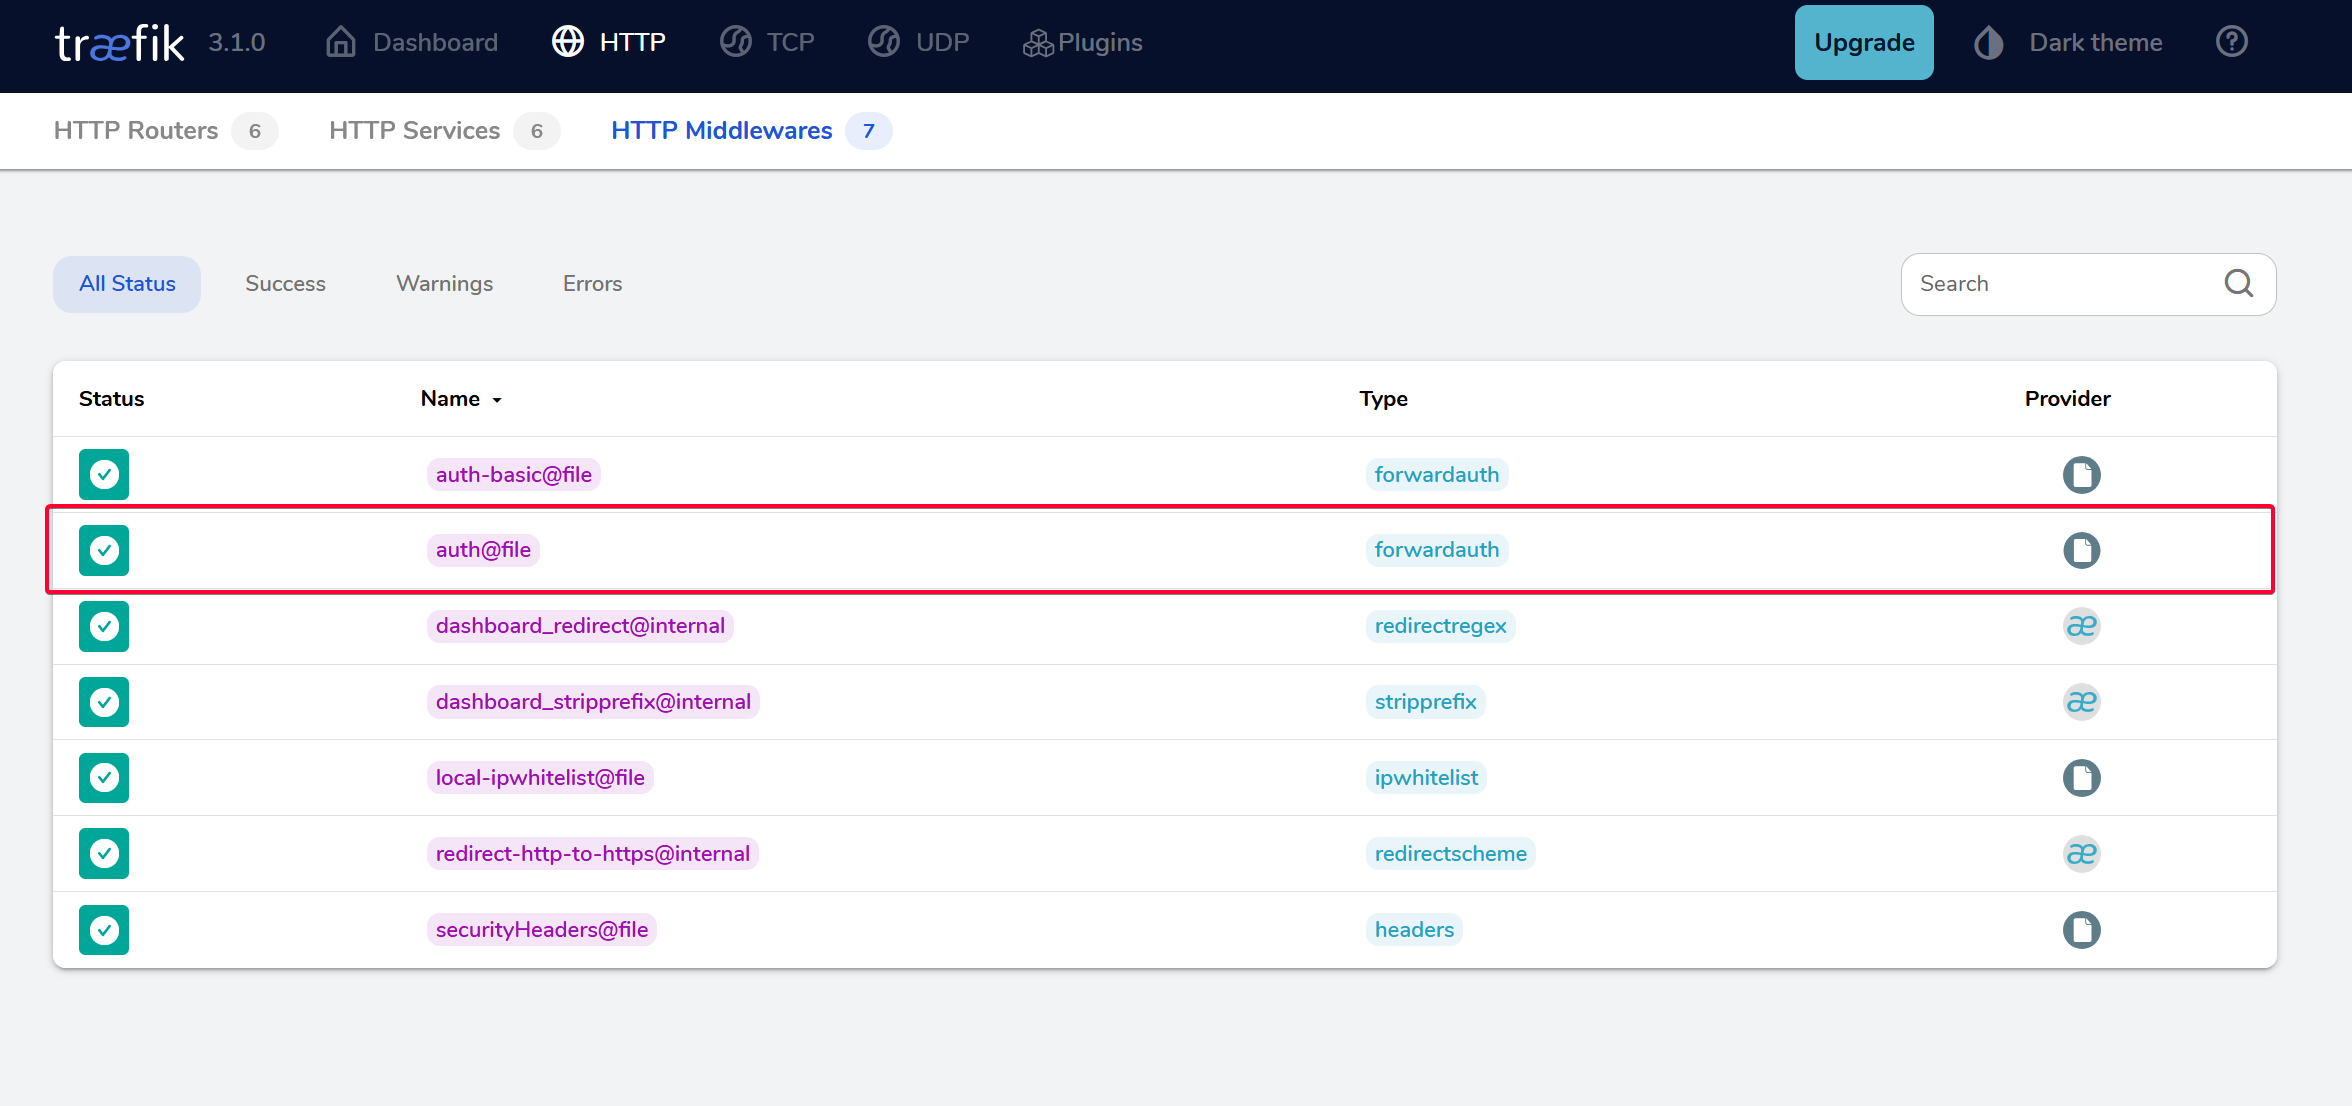
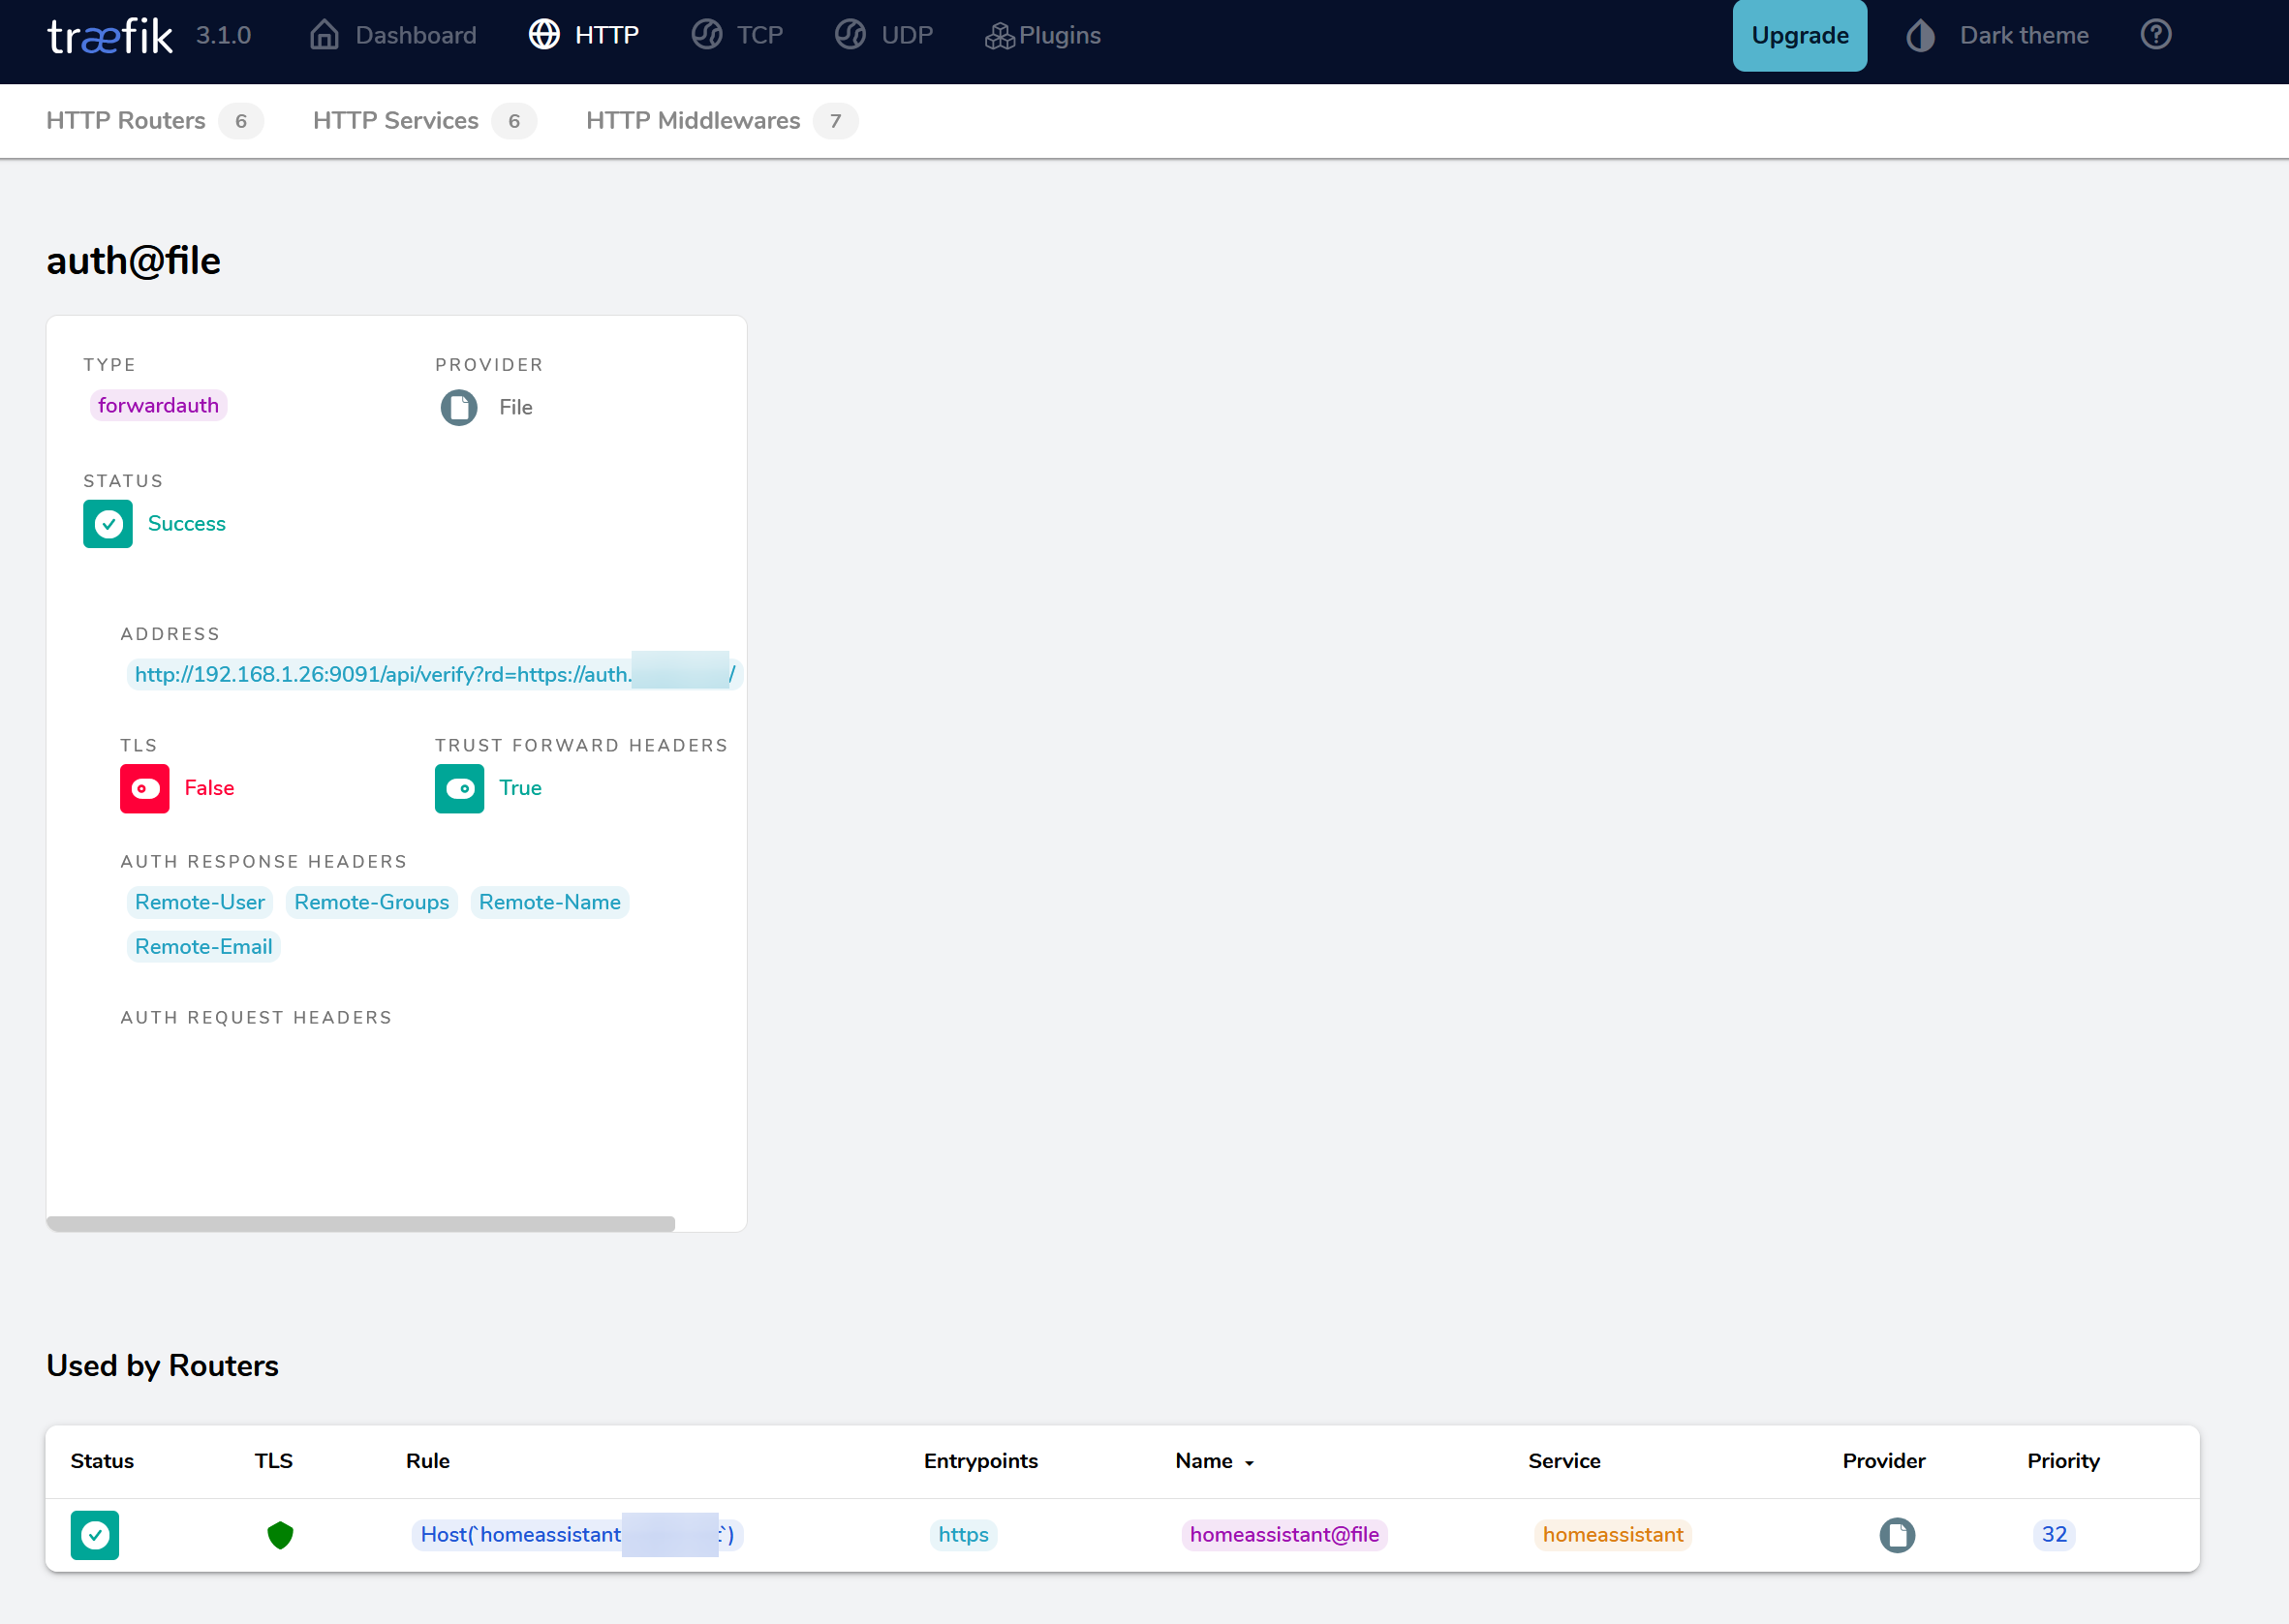
TIP
💡 The reason auth@file is used as the value is because of the way we set it up on Traefik. Just to proof that it exist on Traefik.
Click Apply to redeploy the Radarr container.
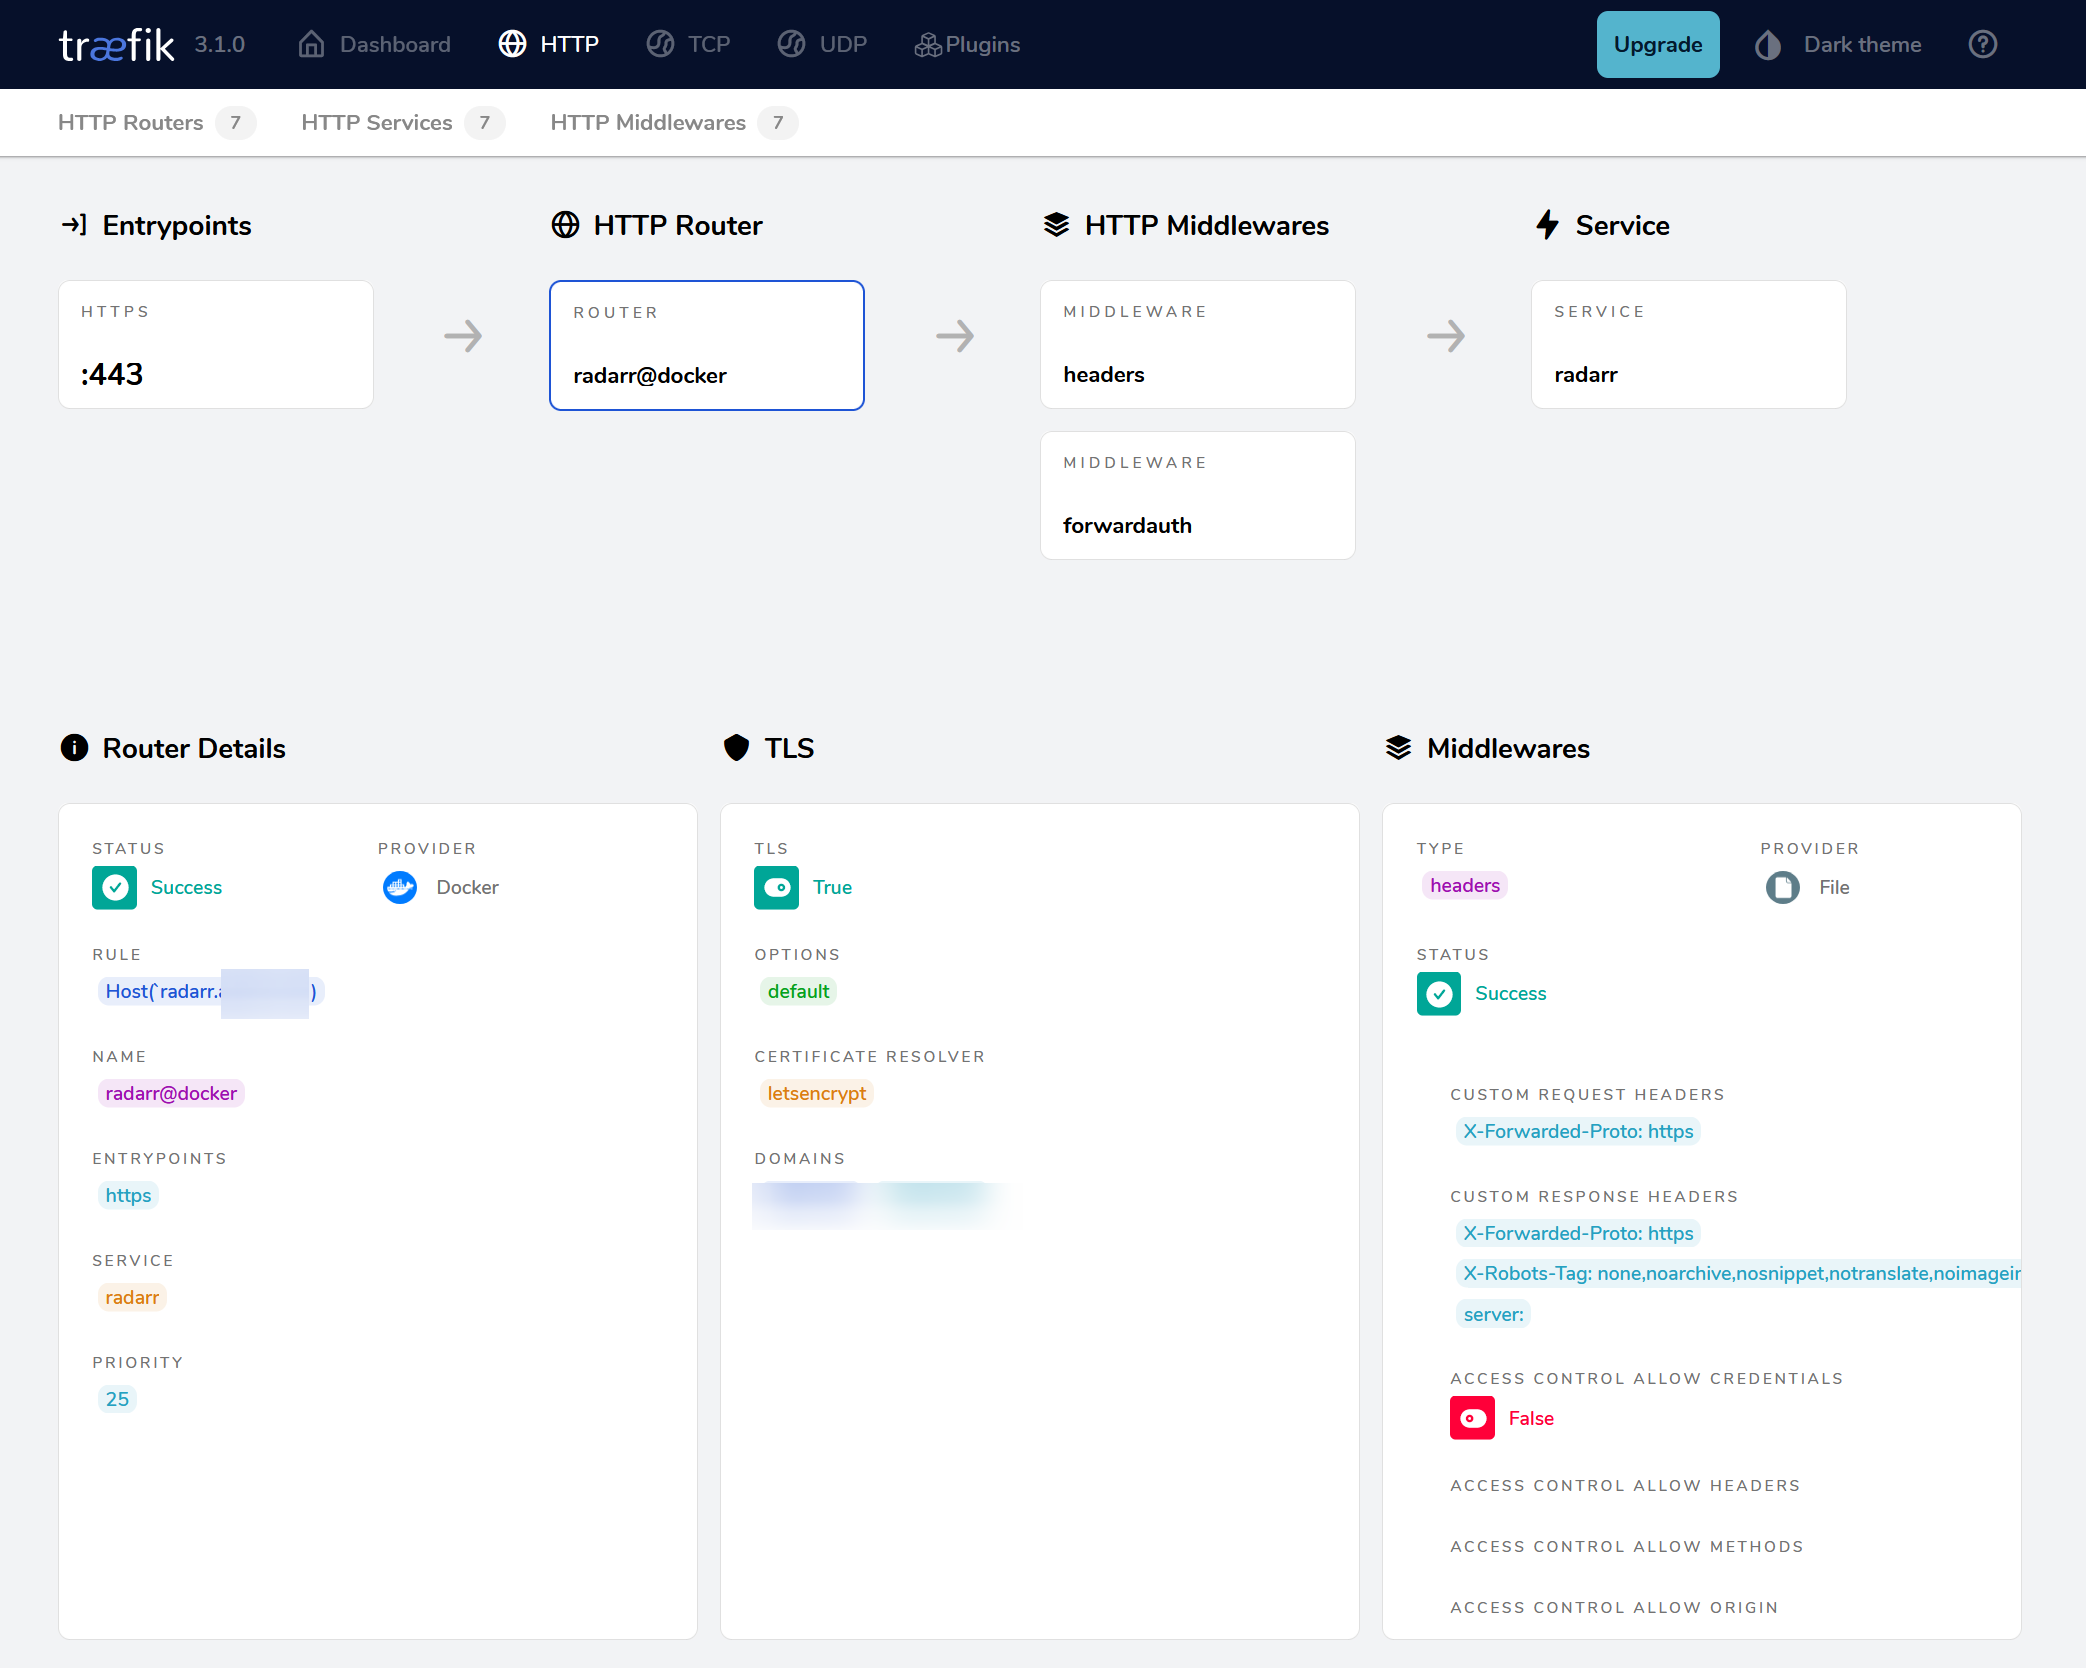
Verify
Make sure you see an entry for radarr.DOMAIN.NAME in Traefik HTTP Routers page.

Click on it and see the routing flow. The flow will go through Authelia forward auth before reaching the service.