Part 4: Set Routes for Home Network
What if you are in the home network and want the traffic to go through Traefik and directly reaches the service, without going through Cloudflare then back to your home network again? This will reduce unnecessary Internet traffic.
There are two methods:
- CloudFlare DNS
- Local DNS
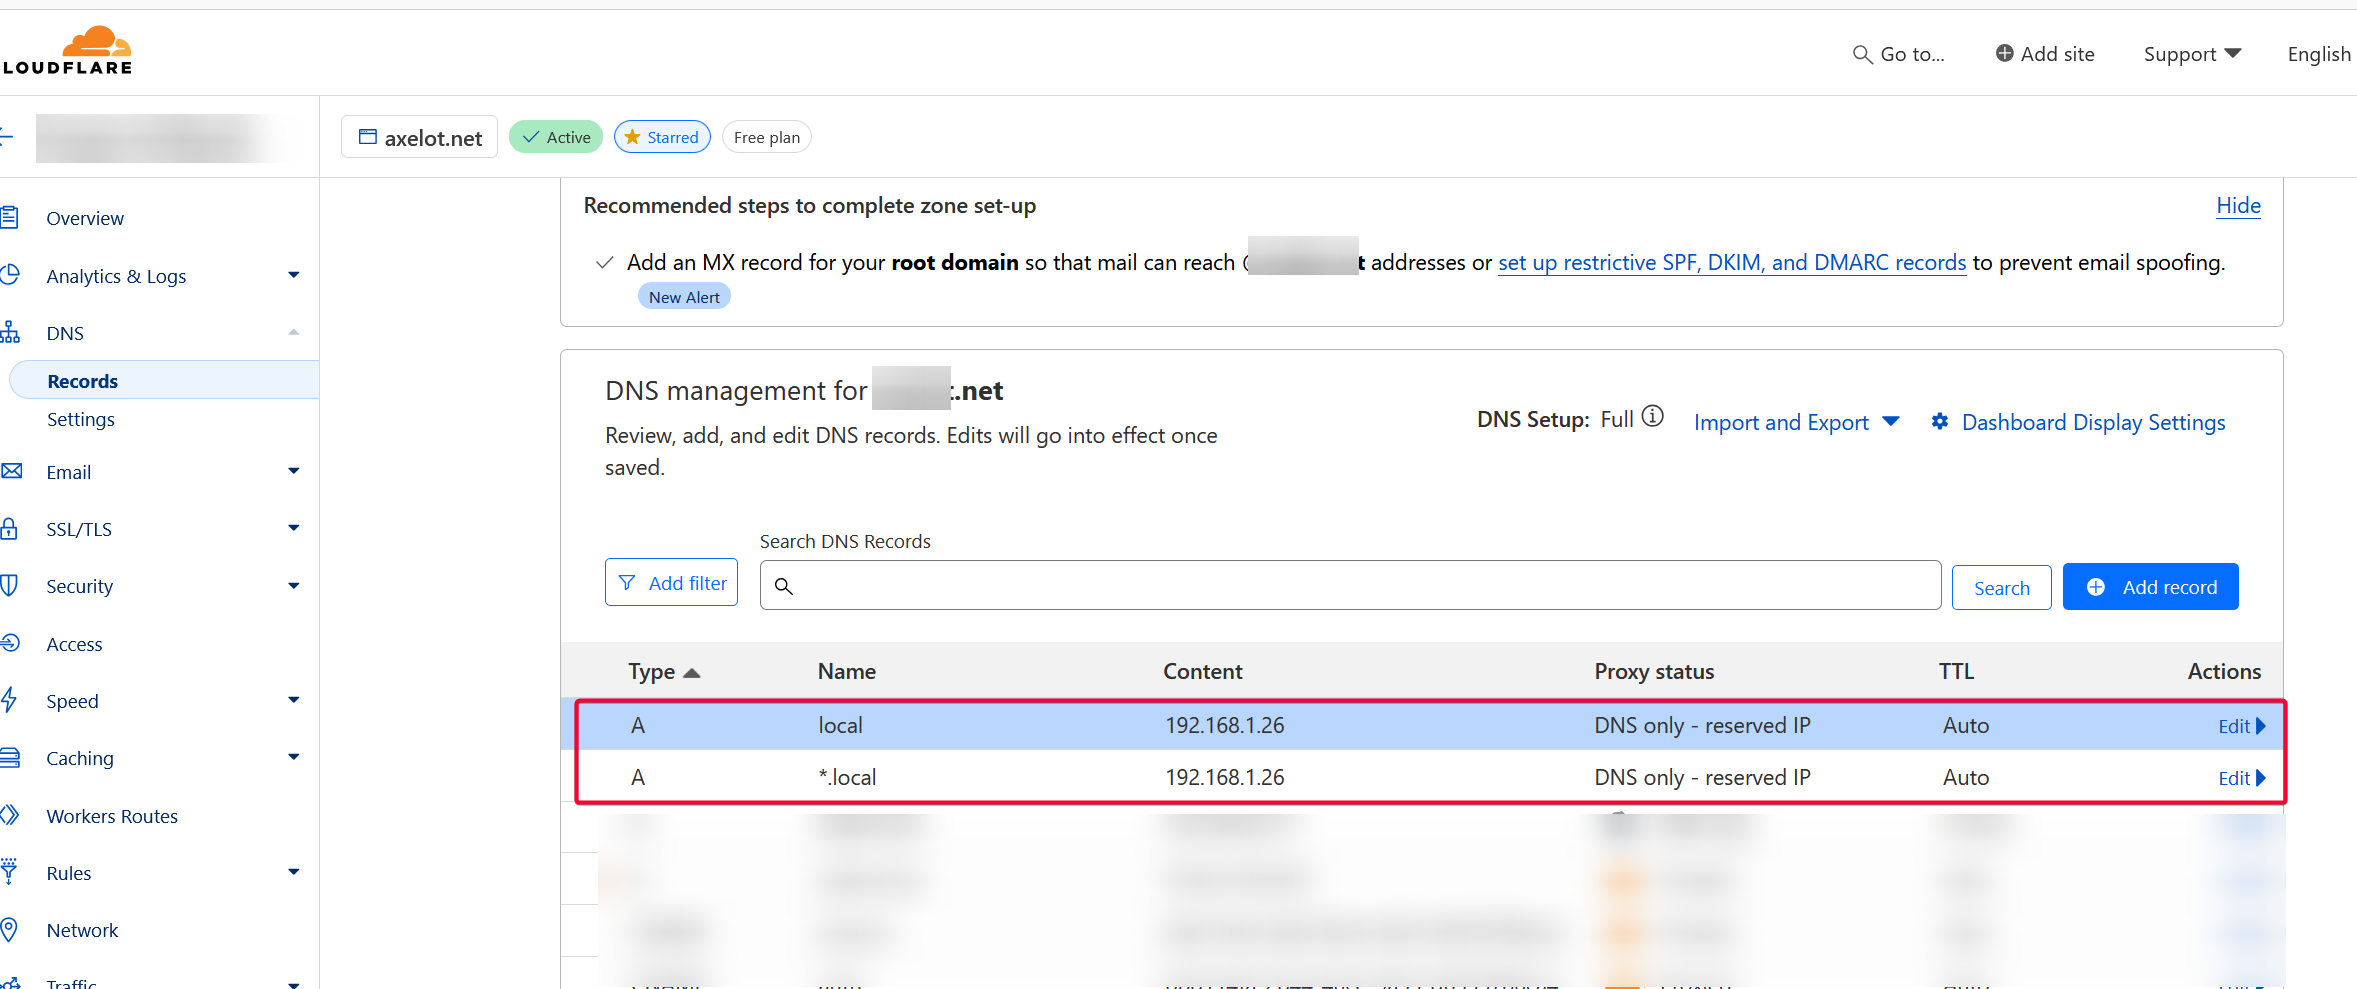
Method 1: CloudFlare DNS
Using this method, you have to use a longer URL or four tuples such as radarr.local.DOMAIN.COM which is longer.
Pros:
- No need to run a local DNS server.
Cons:
- Longer URL with minimum four tuples, e.g.
subdomain.local.root.domain - HTTPS certificate warning because CA doesn’t sign
.localroot domain.
Refer to Setup: Use friendly names on the local network on https://www.nadeau.io/post/unraid-home-server-with-cloudflare/ for more details.
Method 2: Local DNS
I’m using Technitium. Pi-Hole or Adguard are some other good alternatives. I prefered this method as I can use three tuples such assubdomain.root.domain instead of having to specify four tuples, e.g. subdomain.local.root.domain.
Need help setting up Technitium?
Visit my tutorial here to setup Technitium DNS Server
Pros:
- Shorter URL with minimum three tuples, e.g.
subdomain.root.domain
Cons:
- HTTPS certificate warning because CA doesn’t sign
.localroot domain. - Require setting up DNS server in the home network, e.g. Technitium, Pi-Hole, AdGuard.
Create A Local Zone
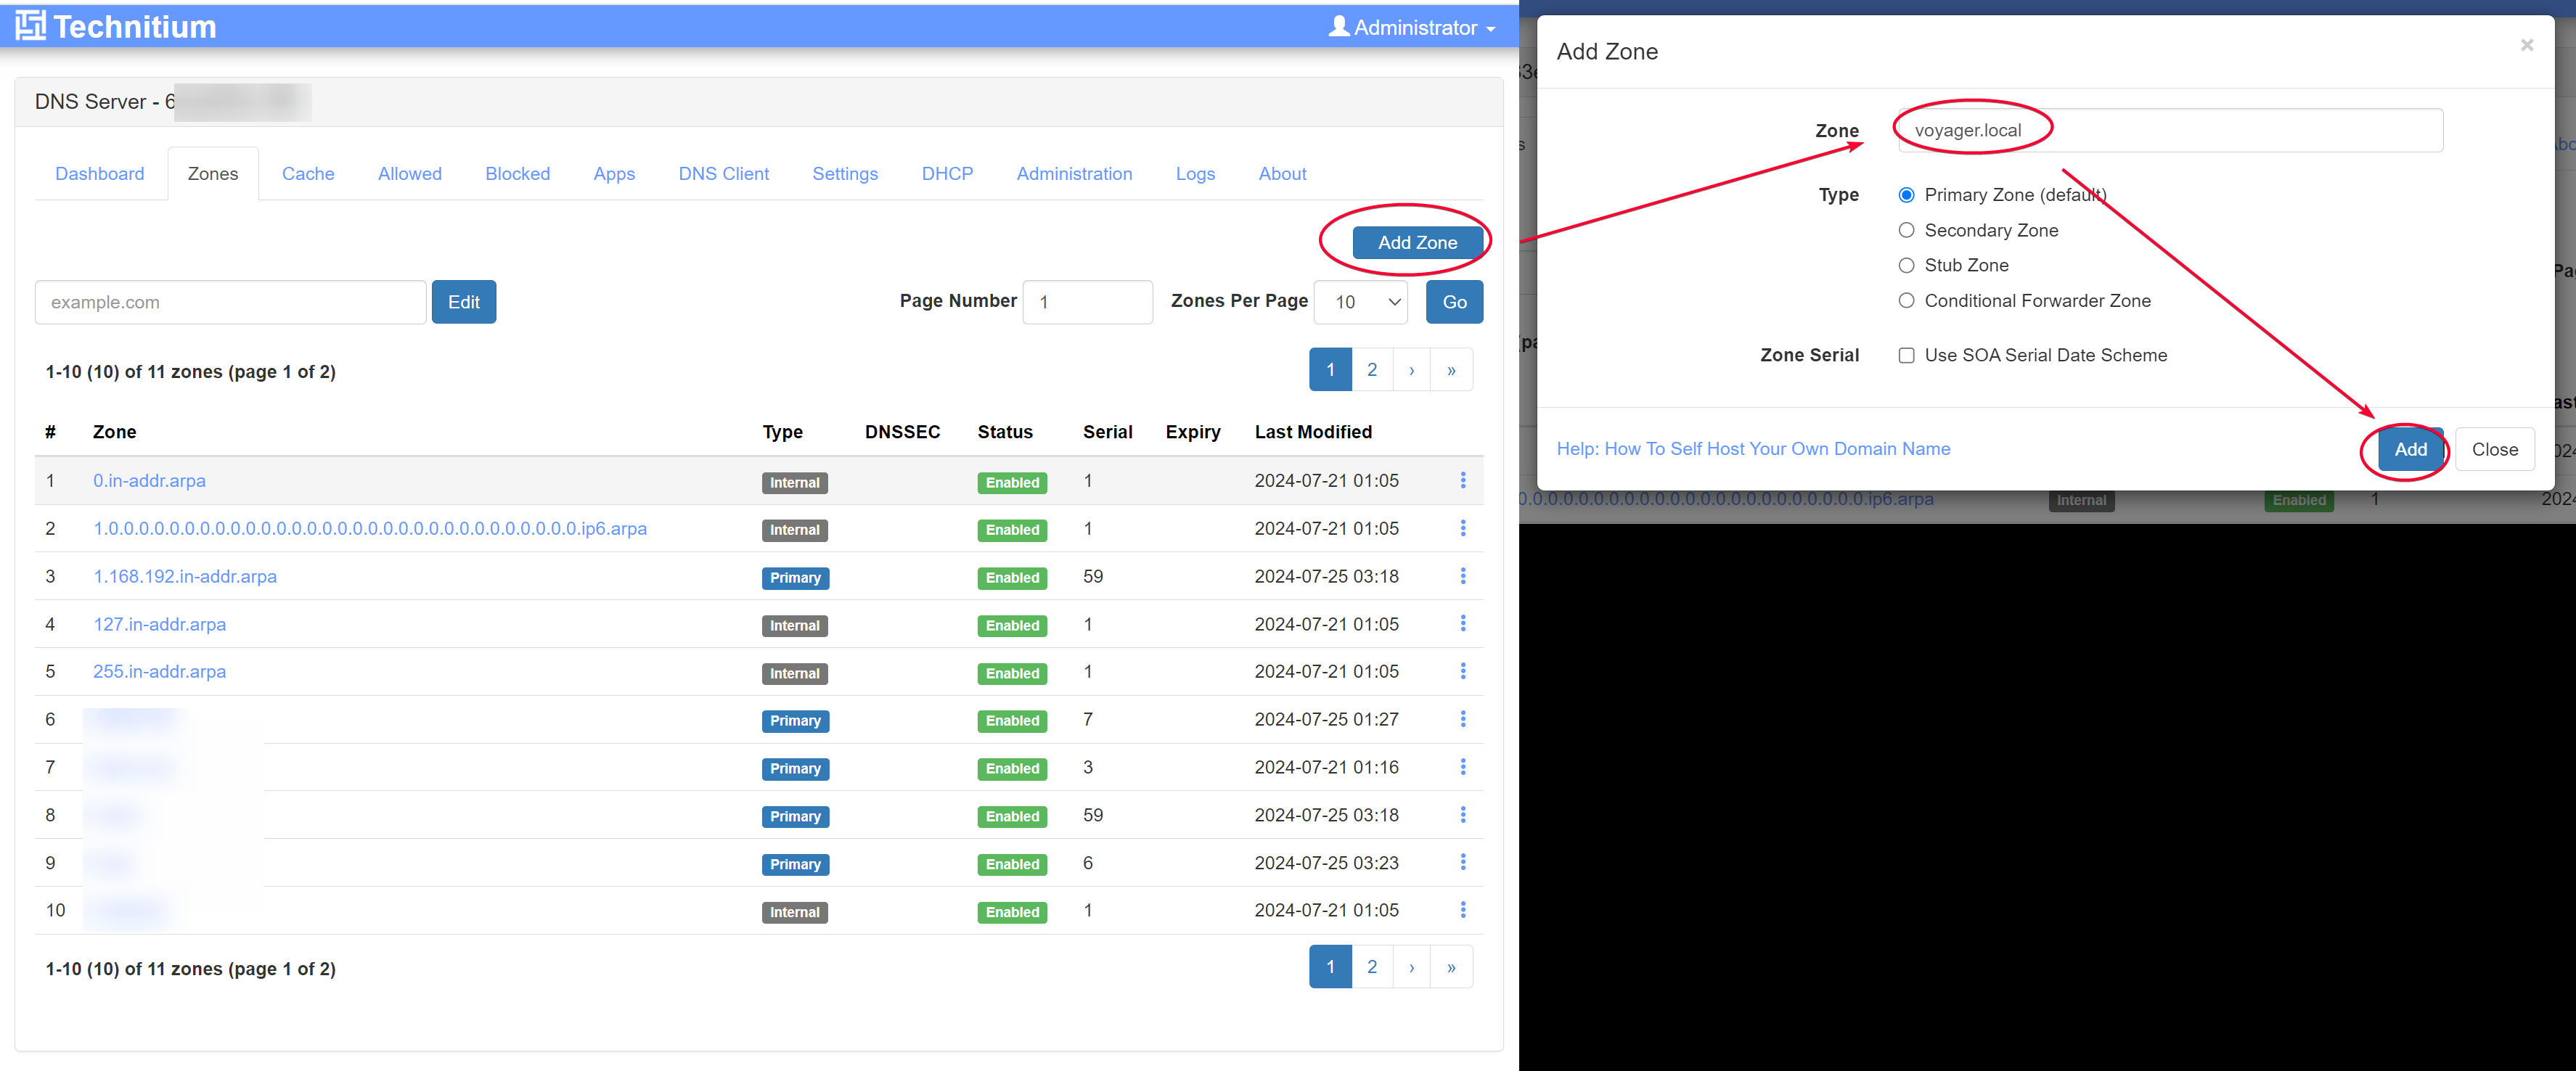
Login to Technitium web UI and select Zones tab.
Click the top right Add Zone button to create a zone. It must have at least a single ., e.g. voyager.local is valid, but local is not!
TIP
I'm using the subdomain voyager, but you can feel free to use another. I recommend ending it with .local
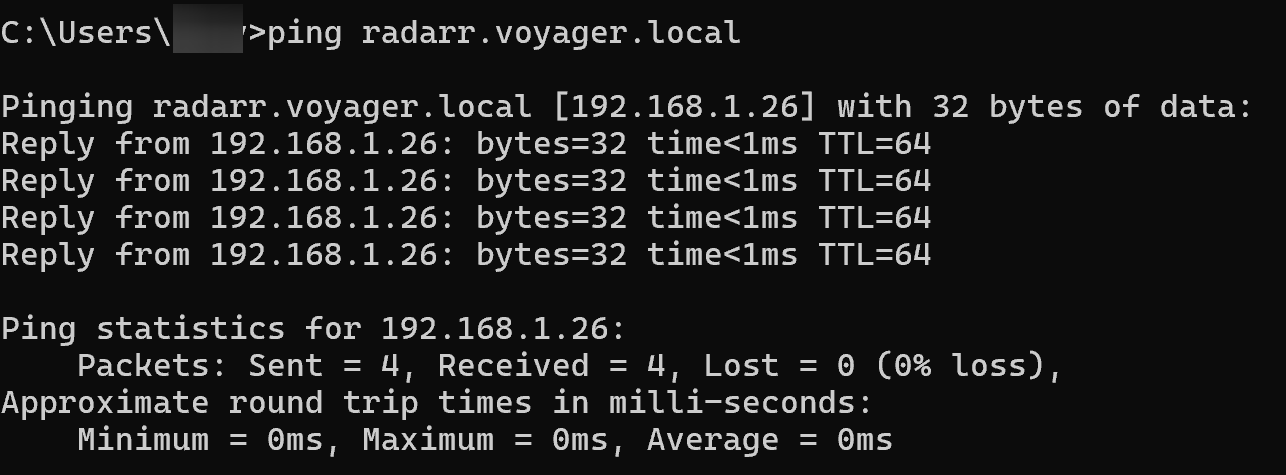
Add a A Record for the service, e.g. radarr

Open Windows command prompt and try pinging the IP. The domain should resolve the the IP address for the unRAID server.
TIP
For this to work make sure you set your PC DNS server to the IP address of the machine running Technitium, most likely it's your unRAID server.
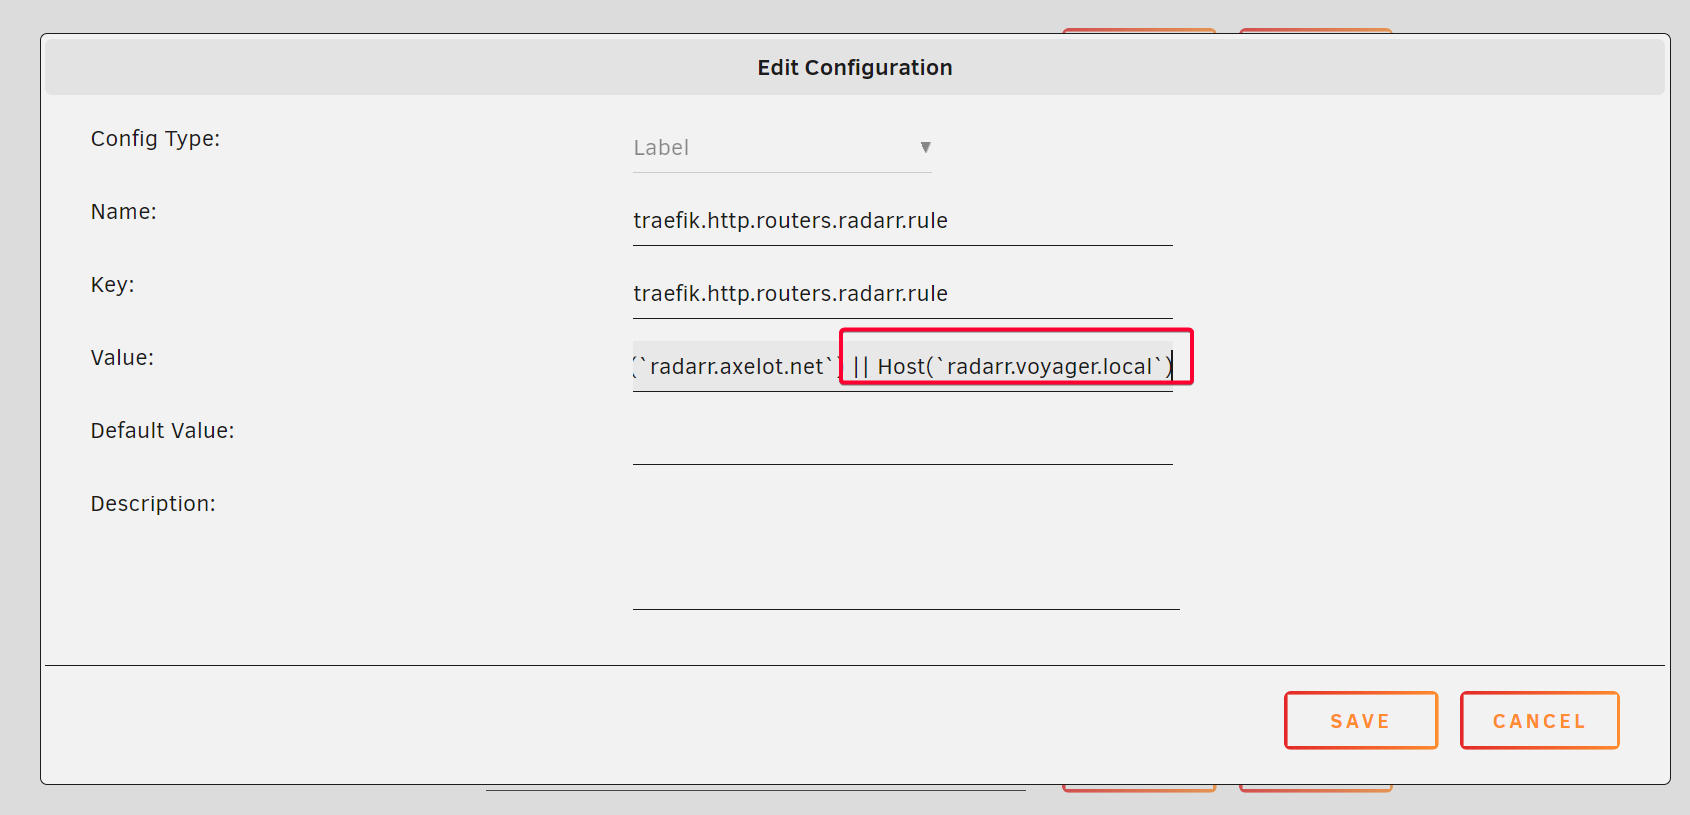
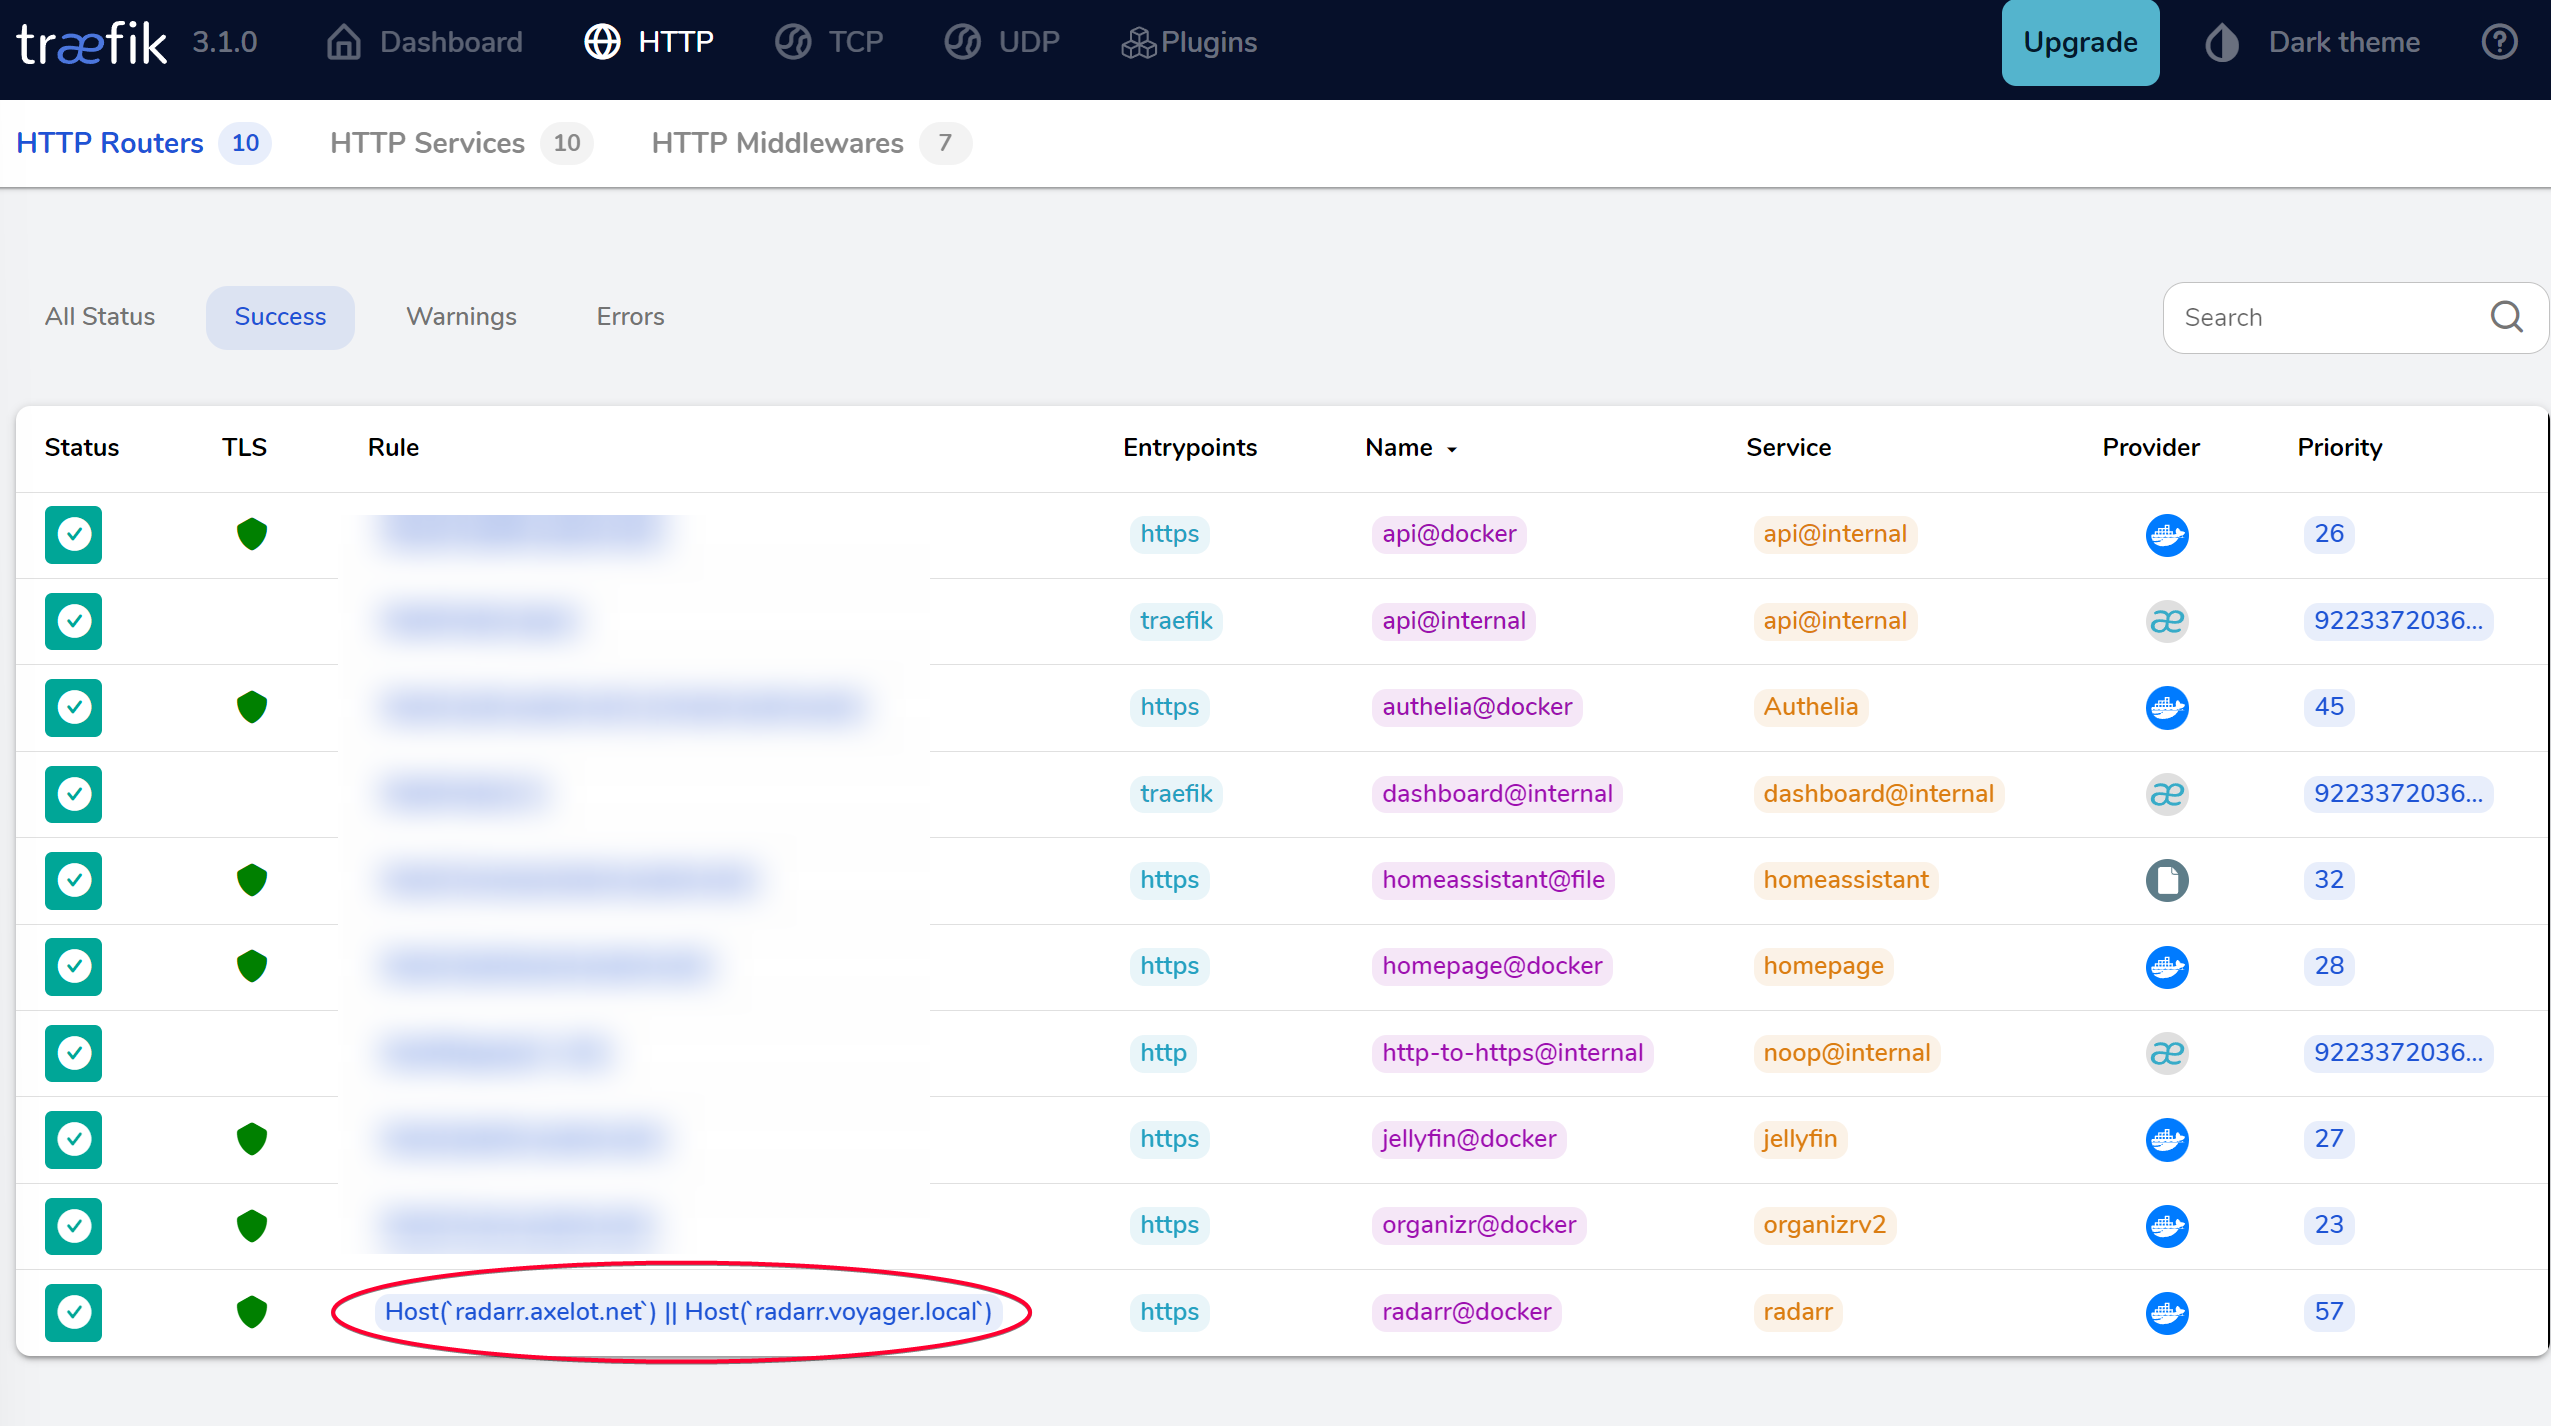
Next, add an additional Host to Radarr container template, label traefik.http.routers.radarr.rule . Use || , NOT , to add a new Host.
This means that any domain name that is radarr.axelot.net or radarr.voyager.local will now routed through Traefik to reach the final Radarr service.
Click Apply when done and check Traefik dashboard to see the newly added host for the radarr router.
Optional: Bypass Access Control Check in Authelia
TIP
Do this only if you setup Traefik to use Authelia as authorization Forward Auth.
If you setup Authelia as the Forward Auth in Traefik, open up it’s configuration.yml and add *.voyager.local to the domain with policy bypass under the access_control stanza. With that set we don’t have to authenticate if the source IP is within your home network 192.168.1.0/24
TIP
Change 192.168.1.0/24 to your home network subnet.
access_control:
  default_policy: deny
  rules:
    ## bypass rule
    - domain:
        - "auth.axelot.net"
      policy: bypass

    ## disable authentication if accessing from home network
    - domain:
        - "*.axelot.net"
        - "*.voyager.local"
      networks:
        - 192.168.1.0/24 // [!code highlight]
      policy: bypass // [!code highlight]

    ## catch-all
    - domain:
        - "*.axelot.net"
      subject:
        - "group:admins"
      policy: two_factor
Validate
Try to access https://radarr.voyager.local, you might see a Certificate warning file but we can ignore. The reason is it uses Traefik internal self signed cert.
If you access https://radarr.axelot.net, that will be intercepted by Authelia web UI and requiring login.